However, there exists another niche segment of users who like to explore the full potential of their devices. This latter group, though small in numbers, are the tech enthusiasts. They unlock the device’s bootloader, try out tons of custom ROMs, install a custom recovery such as TWRP, and gain access to the system partition by rooting it via Magisk [using TWRP or without TWRP, by patching stock boot.img]. However, there is still one string common in both these groups. The use of ADB and Fastboot Commands. The everyday users might use it to boot their device to stock Recovery and then carry out tasks such as Wipe Data or Install Update from Sideload. Likewise, they could also use them to install APKs or uninstall bloatware. Then the geeky users could make use of these commands to flash or boot their device to TWRP, install magisk patched boot.img, unlock the bootloader, boot to Bootloader, or Fastboot Mode among others. Well, the advantages are plenty, but so are the complications involved in setting it up. So what else could be done? Well, you could use and execute ADB and Fastboot Commands on Android without setting it up on your PC. And in this guide, we will help you with just that. But first, let’s make you aware of the benefits and drawbacks of this method. Follow along. On the other hand, if you have a non-rooted device, then check out this guide: How to Run ADB Fastboot Commands directly on Android without Root
How to Pass Magisk SafetyNet on Rooted Android 11Root Android 11 via Magisk Patched boot.img (without TWRP)Fix Android stuck in Recovery Mode: No Command screenFix Magisk patched boot.img issue while Rooting Android 11
Benefits and Downsides of Using ADB and Fastboot Command without PC
While using ADB and Fastboot Commands on your PC, you will have to set up the Android SDK Platform Tools. Likewise, you will also have to Enable Developer Options and then USB Debugging on your device. After this, you will have to launch CMD or PowerShell directory and then connect your device to the PC via USB cable. Only then you will be able to type in your desired commands. Phew! That calls for a lot of effort. But even done, a few errors such as the below ones occur every now and then (which then requires even more efforts to fix):
How to fix ADB Device not found [List of Devices Attached is blank]Detailed Steps to Fix adb is not recognized ErrorHow to Fix Unauthorized Device with ADB Commands [3 methods]
As a result, use ADB and Fastboot Commands on Android without PC seems to be the perfect escape route. Well, it is but with a few strings attached. Since we wouldn’t be using a PC to carry out the aforementioned task, you will need another host in the form of an Android device. And this device needs to be rooted. Apart from that, you will also need a USB OTG to connect your device with the host device. So a second Android device (first will be your own :D), with root access and the requirement of the OTG is something that might persuade some users from trying out this task. However, if that’s good with you and you are ready to proceed ahead, then here are the steps to use ADB and Fastboot Commands without a PC.
How to Use ADB and Fastboot Commands on Android Without PC
Before listing out the instructions, we have mentioned all the prerequisites below. Make sure you check-mark all these requirements and only then proceed with the instruction set. [Don’t Miss: Wireless Debugging Feature of Android 11: How to Use].
Prerequisites
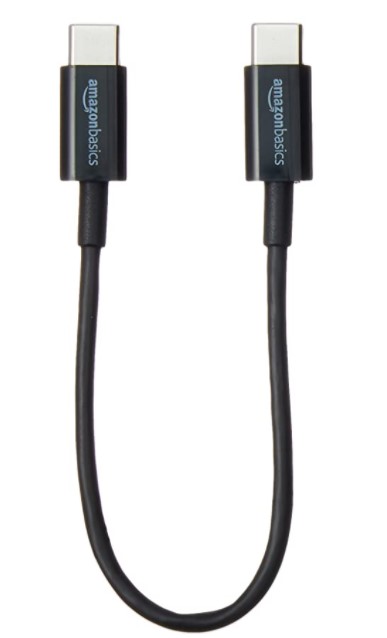
First and foremost, you need a second Android device that is rooted. This device will act as a host where we would be executing the ADB and Fastboot Commands (in other words, it will perform the role of your PC). So if your second device isn’t rooted, then we have provided a few guides that you may have a look at [NOTE: your primary device doesn’t need to be rooted]:Root Android Devices Without TWRP RecoveryHow to Root Android Devices via TWRP RecoveryHow to Root any Samsung device via Magisk and OdinNext up, you will also need to have the Magisk Manager app installed. If you have rooted your device, then chances are it might be already installed. However, if that isn’t the case, then download it from here: [Update: Added Magisk 21] Everything About Magisk- Manager, Modules, and More.Likewise, you’ll require a USB OTG or a USB Type-C to a USB Type-C cable. This will be needed to connect your primary device to the host device (the rooted Android phone).
That’s it. These were all the requirements. You may now proceed with the steps to use ADB and Fastboot Commands on Android without a PC.
STEP 1: Install Android and Fastboot on Android
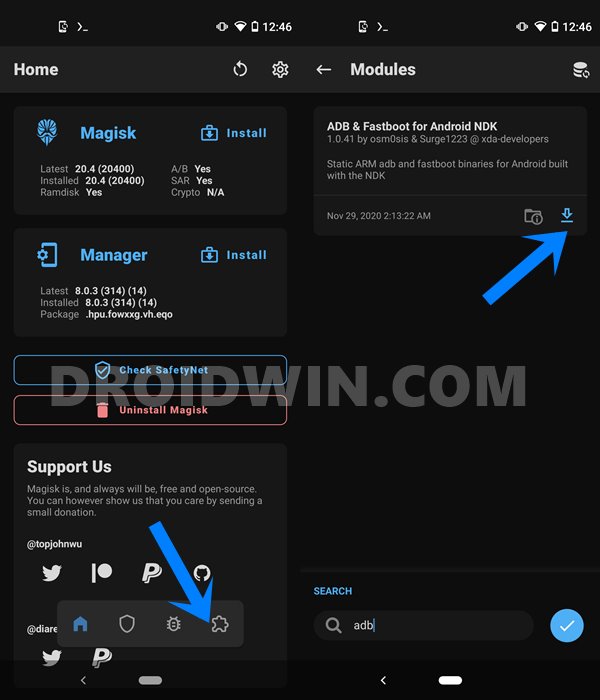
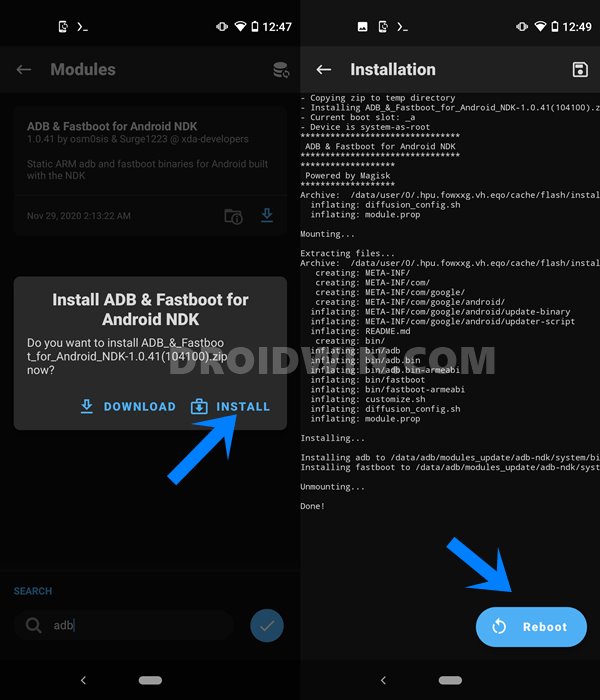
The first step requires you to install Android and Fastboot on your host device (the rooted Android device). Follow the below steps to do so:
STEP 2: Install Termux App
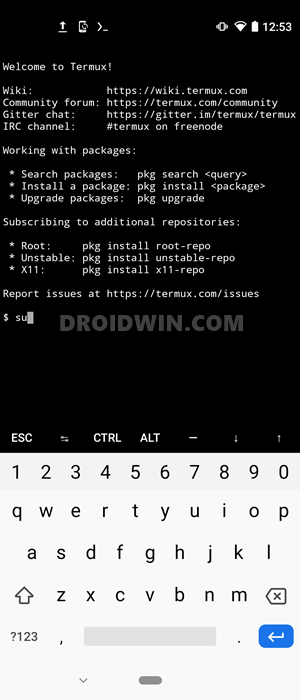
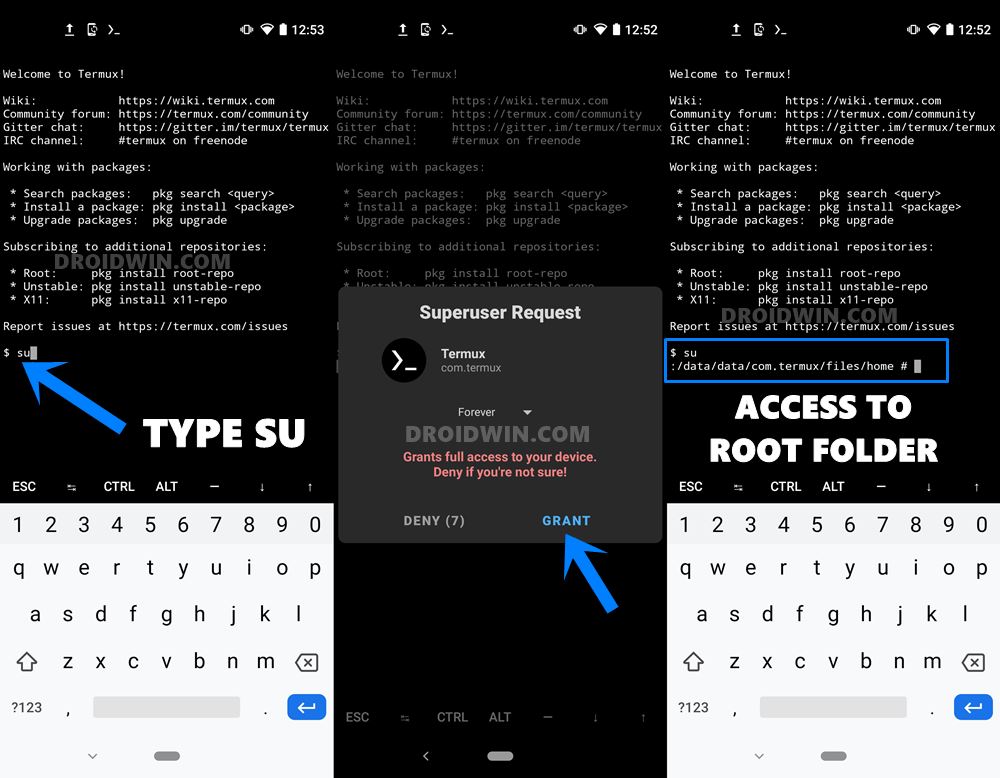
Termux is a terminal emulator app for Android devices. It allows you to execute various superuser commands. As for this guide, we will be executing various ADB and Fastboot commands inside the Termux window itself (similar to how we do so on the Command Prompt window on your PC).
So head over to the Play Store and download the Termux app on your rooted Android device (the host device). Once downloaded, install it and proceed to the next step to use ADB and Fastboot Commands on Android without a PC.
[GUIDE] Flash ROMs/Magisk/TWRP/Kernels on A/B Partition DevicesEverything About Magisk- Manager, Modules and MoreBest Magisk Modules of 2020 [PART-1][3 METHODS] Unroot any Android Device-Uninstall Magisk
STEP 3: Enable USB Debugging
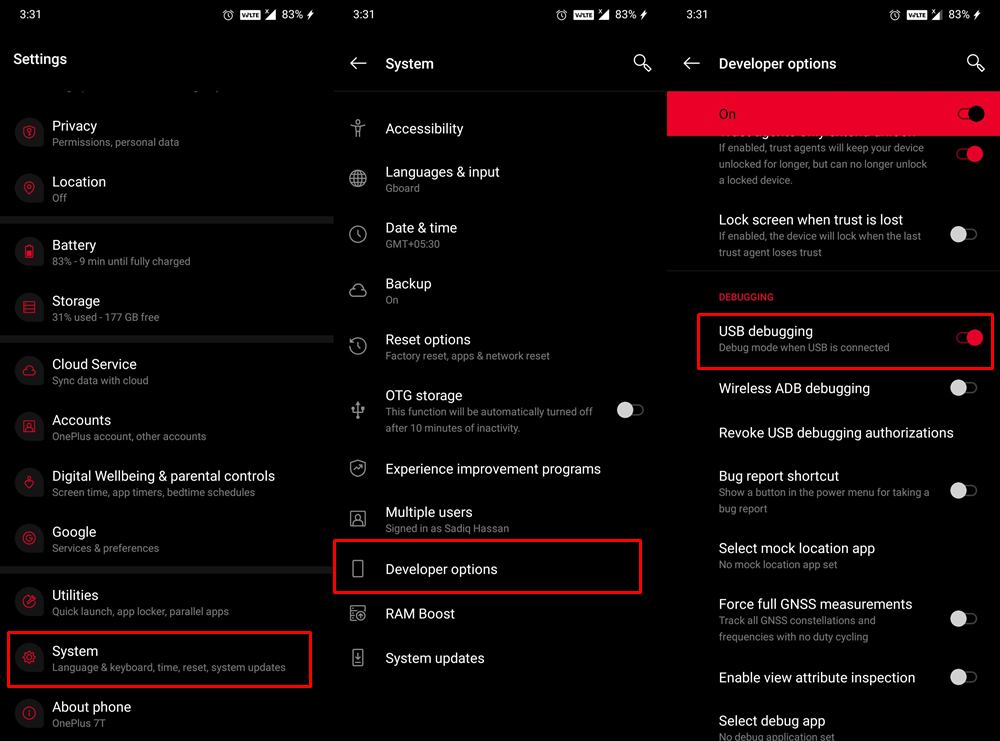
You will now have to enable USB Debugging on your primary device. This is again similar to what you would have done if you were to connect your device to the PC for executing commands. So head over to Settings > About Phone > Tap on Build Number 7 times (Xiaomi users tap on MIUI Number 7 times) > Go back to Settings > System > Advanced > Developer Options > Enable USB Debugging. [Don’t Miss: How to Enable USB Debugging on a Broken Android Device’s Screen]
STEP 4: Connect both the Android Devices
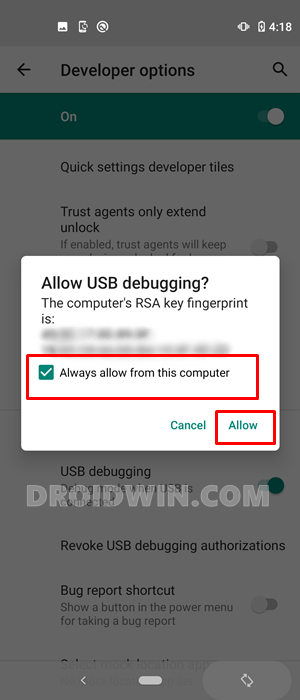
Most newer Android devices come with Type C ports. So if both your Android devices have Type C ports, then you only need a single USB Type-C cable. On the other hand, if one of the devices has a Micro USB and the other is USB Type-C, then you will need a Micro USB OTG cable and a USB A to USB C cable as well. As far as the connection is concerned, if both the devices have Type C then you could simply connect them using the USB Type-C cable. On the other hand, if you are using the OTG adapter, then connect it to the host rooted device. After this, connect the USB cable from OTG to your primary device. As soon as you connect both the devices, you will get the USB Debugging prompt on both these devices, tap OK on both these devices. You may also enable Always allow from this computer option on both the devices (see below image). Now that the connection stands successful, you may now proceed with the steps to use ADB and Fastboot Commands on Android without a PC.
How to Fix FAILED (remote: unknown command) ErrorHow to Extract payload.bin and get the stock boot image fileFix: pip is not recognized as an internal or external commandDetailed Steps to Fix adb is not recognized Error
STEP 5: Use Fastboot Commands on Android Device without PC
Now that both the devices are connected, it’s time to start off with the process. Follow the below steps for that: On that note, we conclude the guide on how to use ADB and Fastboot commands on Android without a PC. If you have any queries concerning the aforementioned instructions, do let us know in the comments section. We will get back to you with a solution at the earliest.
How to Root any Android Device without PCHow to Permanently Install TWRP without TWRP ZIP File (only using TWRP.img file)Root Android Devices Without TWRP RecoveryHow to Fix TWRP Error 7 (While Flashing Custom ROM via TWRP)
About Chief Editor
