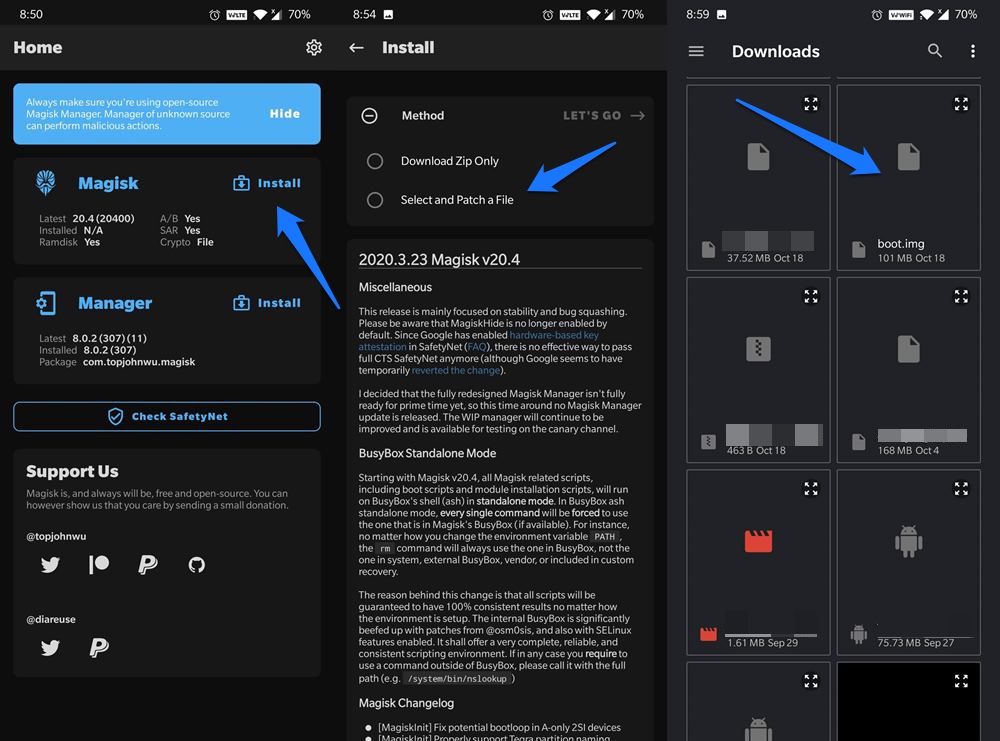
Along the same lines, the tradition of it being an active player in custom development has also been justified with these devices. Once you have unlocked the device’s bootloader, you would have rather unlocked the gateway to a plethora of customizations. From flashing custom ROMs to installing a custom recovery like TWRP or OrangeFox, there’s a lot to try out. Likewise, you could also gain administrative privileges and try out mods such as Xposed Framework, Magisk Modules, and Substratum Themes. All this is possible once you root the device via the Magisk App (Magisk ZIP and Magisk Manager are combined under App, starting from v22). Now there are two different approaches through which you could carry out this task. The first one is by flashing the Magisk ZIP via TWRP. However, as of now, this custom recovery isn’t yet available for these devices. Furthermore, with the complexities involved, people generally prefer to stay away from this. This then brings them to the second method which involves patching the stock boot.img and flashing it via Magisk. And in this guide, we will be focusing on this itself. So without further ado, let’s start off with the guide to root the Redmi Note 10, Note 10 Pro, and Note 10 Pro via Magisk without using TWRP.
How to Root Redmi Note 10/Pro/Pro Max via Magisk without TWRP
The below instructions are listed under separate sections for ease of understanding. Make sure to follow in the exact same sequence as mentioned below. Droidwin and its members wouldn’t be held responsible in case of a thermonuclear war, your alarm doesn’t wake you up, or if anything happens to your device and data by performing the below steps.
Install Android SDK
To begin with, install the Android SDK Platform Tools on your PC. This is the official ADB and Fastboot binary provided by Google and is the only recommended one. So download it and then extract it to any convenient location on your PC. Doing so will give you the platform-tools folder, which will be used throughout this guide.
Enable USB Debugging and OEM Unlocking
Next up, you will have to enable USB Debugging and OEM Unlocking on your device. The former will make your device recognizable by the PC in ADB mode. This will then allow you to boot your device to Fastboot Mode.
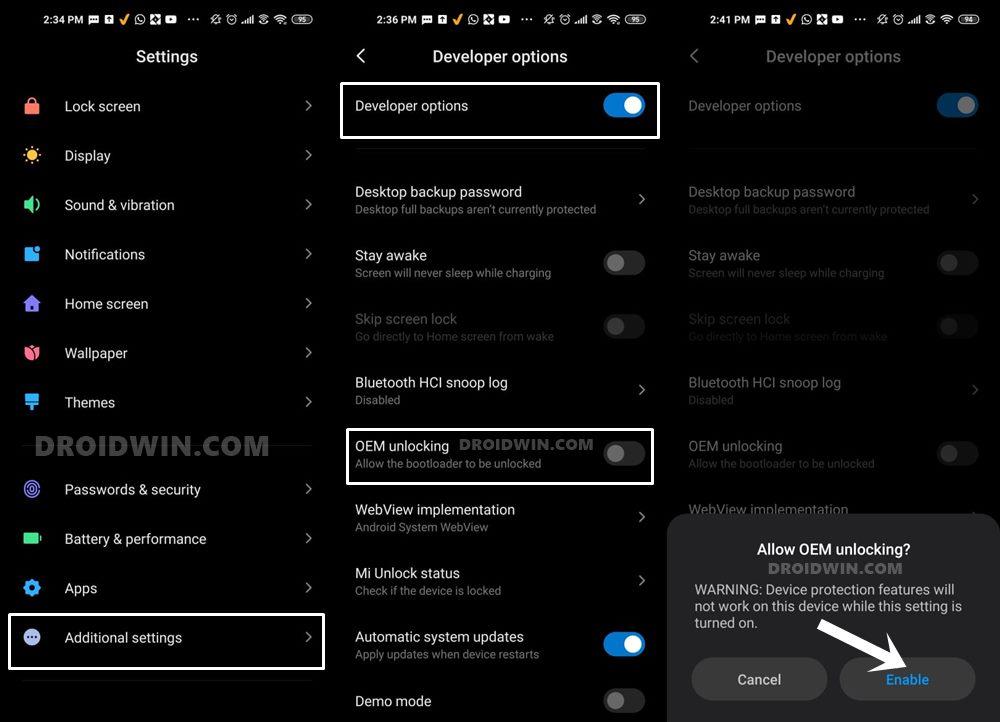
On the other hand, OEM Unlocking is required to carry out the bootloader unlocking process. So head over to Settings > About Phone > Tap on MIUI Number 7 times > Go back to Settings > System > Developer Options > Enable USB Debugging and OEM Unlocking.
Unlock Bootloader on Redmi Note 10/Pro/Pro Max
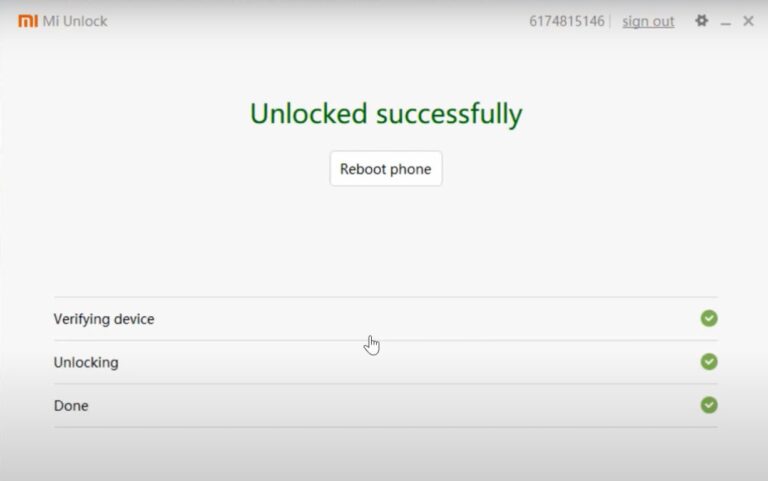
You will also have to unlock the bootloader on your Redmi Note 10/Pro/Pro Max if you wish to root it via Magisk without using TWRP. Do keep in mind that doing so will wipe off all the data and might make the device’s warranty null and void as well. So if that’s well and good, then refer to our guide to Unlock Bootloader on any Xiaomi Device.
Download Redmi Note 10/Pro/Pro Max Fastboot ROM
Next up, download the Fastboot ROM for your device. Make sure to download the same firmware version that is currently installed onto your device. You may either download the same from the MI official site (if accessible) or else proceed with other third-party sites such as Xiaomi Firmware Updater. As for this guide, I am using the Redmi Note 10 Pro / Pro Max India (sweetin) Fastboot Stable ROM version V12.0.6.0.RKFINXM. Download: Redmi Note 10 Pro Max India sweetin V12.0.6.0.RKFINXM boot.img
Extract Stock Boot.img
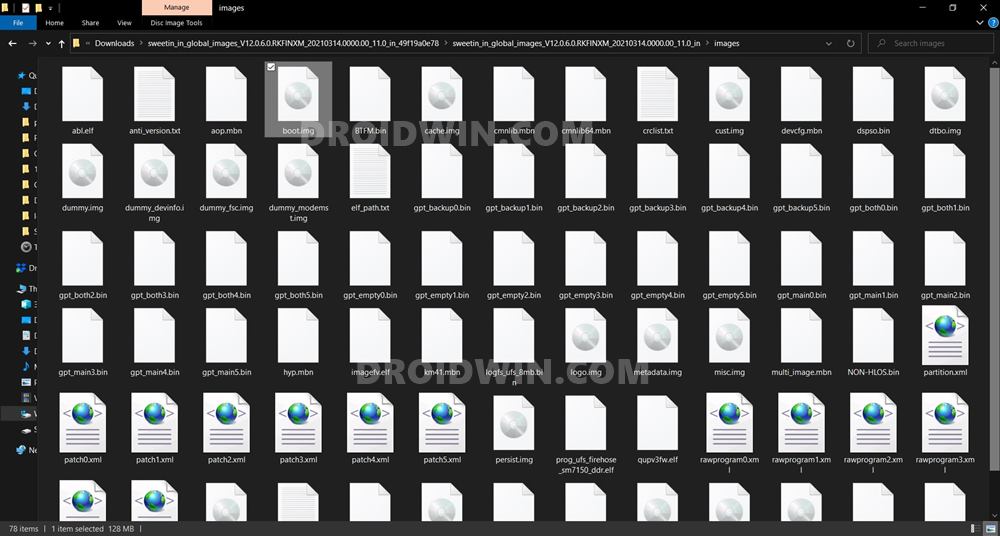
Once you have downloaded the ROM, extract it to any convenient location on your PC. Once extracted, go to the Images folder. Within that, you should see all the partition files in IMG format. Copy the boot.img file and send it to your device.
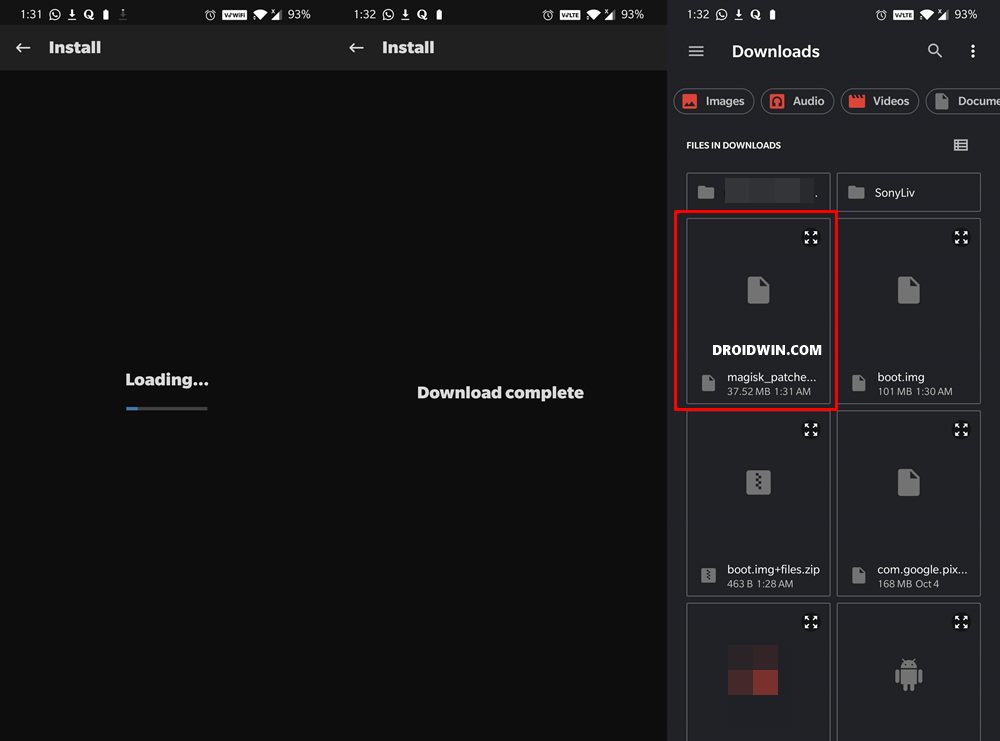
Patch Redmi Note 10/Pro/Pro Max Stock Boot.img via Magisk
Boot Redmi Note 10/Pro/Pro Max to Fastboot Mode
You should now see the famous MI Bunny Logo along with the Fastboot text written underneath it, signifying that the device has successfully booted to Fastboot. Let’s now move over to the final set of instructions and root Redmi Note 10/Pro/Pro Max via Magisk without using TWRP Recovery.
Flash Magisk Patched Boot.img and Root Redmi Note 10/Pro/Pro Max
That’s it. These were the steps to root your Redmi Note 10, Note 10 Pro, and Note 10 Pro Max devices via Magisk without using TWRP Recovery. If you have any queries concerning the aforementioned steps, do let us know in the comments. We will get back to you with a solution at the earliest.
About Chief Editor