This road leads us to custom development, where the possibilities stand endless. For example, you could replace the device’s stock recovery with a custom one such as TWRP. Likewise, you could also install custom ROMs, or gain access to the system partition. The latter is possible by rooting the device via Magisk- flashing Magisk App via TWRP or patching and flashing the boot.img via Fastboot Commands. This way you could then flash binaries such as Magisk Modules, Substratum Themes, Xposed Frameworks, and the likes. However, to carry out any of the aforementioned tweaks, you need to checkmark a major requirement- your device’s bootloader needs to be unlocked. Or should it? Well there now seems to be a workaround that allows you to root your Mediatek device directly on a locked bootloader. As a result, your device warranty might not be nullified and there will be no data loss as well. Furthermore, in some Xiaomi MTK devices, you have to wait around 168 hours before you could start with the unlocking process. But using this guide, you could easily skip this wait time as well (since no unlocking is required!). So without any further ado, let’s get started with the instructions.
How to Install TWRP on MediaTek using SP Flash ToolHow to Root any MediaTek Device Using SP Flash ToolA Detailed Guide to Install OTA Updates in Rooted Android DeviceHow to Unbrick any MediaTek Phone using SP Flash Tool
How to Root any MediaTek Device on Locked Bootloader
Before starting off with the steps, make sure to take a backup of all the data on your device. Furthermore, the below instructions are listed under separate sections for ease of understanding. Make sure to follow in the exact same sequence as mentioned below. Droidwin and its members wouldn’t be held responsible in case of a thermonuclear war, your alarm doesn’t wake you up, or if anything happens to your device and data by performing the below steps.
Important Points
This guide to root MediaTek devices on a locked bootloader is applicable for devices that come with MediaTek ARMV8 chipset. These include the MT67xx, MT816x, MT817x, or MT6580 chipsets. [Credits: XDA Senior Member diplomatic.]Since the bootloader is locked, you wouldn’t be able to modify the boot partition. As a result, you should not use the Direct Install Method of Magisk to update it.Furthermore, as of now, this method works on Magisk v19.4 to v21.4 only. It isn’t compatible with Magisk v22. But this shouldn’t be a cause of concern as the earlier builds work pretty well without any issue. With that said, there is still a way of updating magisk, which we have mentioned at the end of this guide. Interested users should definitely check it out.
So keeping all these points in mind, let’s start off with the guide to root your MediaTek device with a locked bootloader.
STEP 1: Set Up init.d Support
Before moving ahead, make sure that the init.d script support on your device exactly matches the value as is shown in my screenshot. Furthermore, the Selected Folder patch should be: /storage/emulated/0/init.d. If that is all well and good, then you are good to proceed ahead to root your MediaTek device on a locked bootloader.
STEP 2: Setting up Magisk Boot and MTK-SU
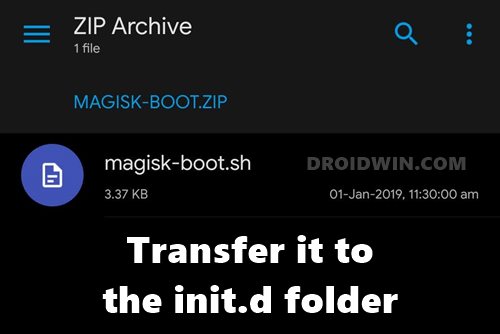
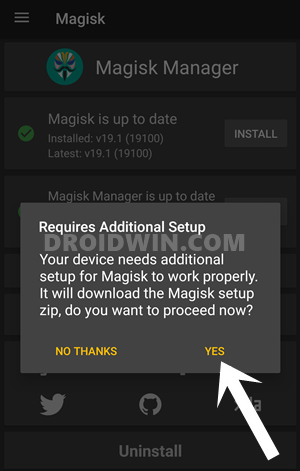
So with this, we conclude the guide on how to root any MediaTek device on a locked bootloader. If you have any queries concerning the aforementioned steps, do let us know in the comments. We will get back to you with a solution at the earliest. With that said, let’s now turn our attention to how to update the Magisk app. Follow along. Since your device’s bootloader is locked, you wouldn’t be able to update it via the conventional Direct Install method. Rather, download the latest Magisk ZIP file, extract it, copy the magiskinit file, and copy it to the bin folder. Then launch the init.d scripts support app and run the scripts.
About Chief Editor


