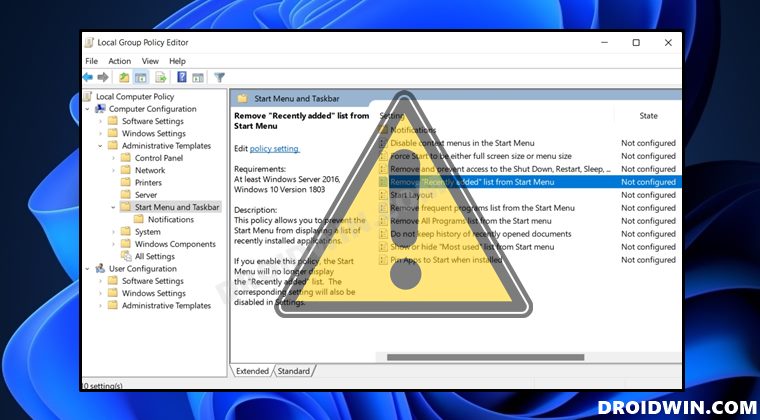
So instead of creating a DWord 32-bit file, you just need to select Enabled/Disabled. However, in spite of all the goodies attached, it isn’t free from its fair share of issues either. Various users have voiced their concern that the Local Group Policy Editor is not working issue on their Windows 11 PC. If you are also among them, then this guide shall help you rectify this issue once and for all. Follow along for the fixes.
Fix Local Group Policy Editor not working in Windows 11
It is recommended that you try out each of the below-mentioned workarounds and then see which one spells out success for you. So with that in mind, let’s get started.
FIX 1: Run Local Group Policy Editor as Admin
To begin with, you should consider launching Local Group Policy Editor with an elevated permission set. Here’s how it could be done-
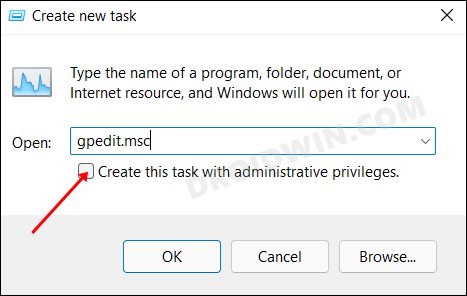
FIX 2:Re-Enable Local Group Policy Editor
The Local Group Policy Editor is only supported on the Pro, Enterprise, and Education editions of Windows. And with the help of a nifty workaround, you could use it in the Home Edition. But since this is a tweaked method, there could be a few hiccups now and then.
To rectify it, you should consider re-enabling the LGPE, using the instructions given here- How to Enable Group Policy Editor in Windows 11 Home. Try it out and then check if it fixes the Local Group Policy Editor not working issue on your Windows 11 PC.
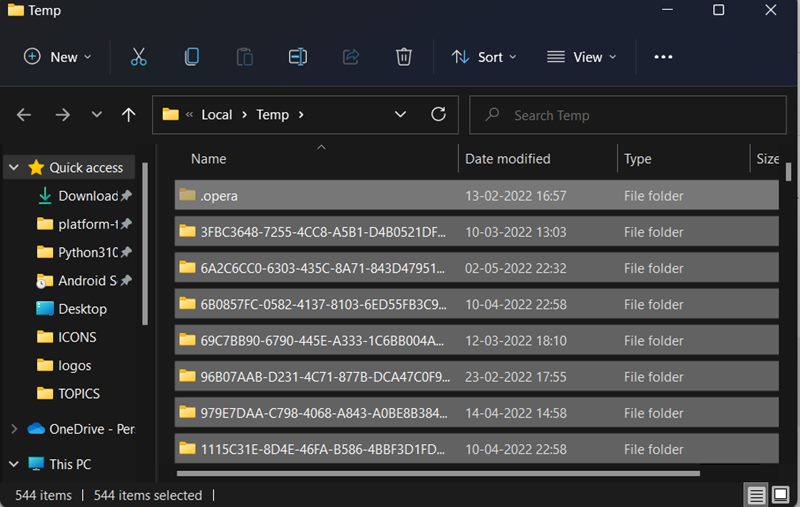
FIX 3: Delete Temporary Files
In some instances, the temporarily stored files could lead to a few conflicts with the proper functioning of your PC. Therefore, you should consider deleting these cached files and then test out the results.
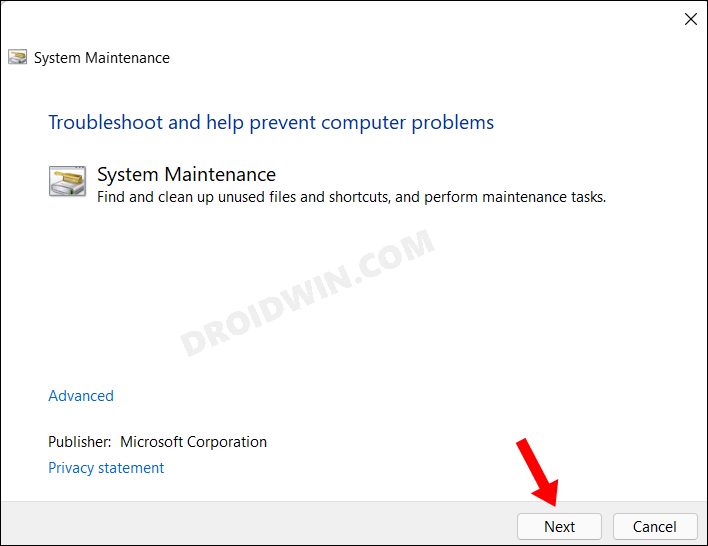
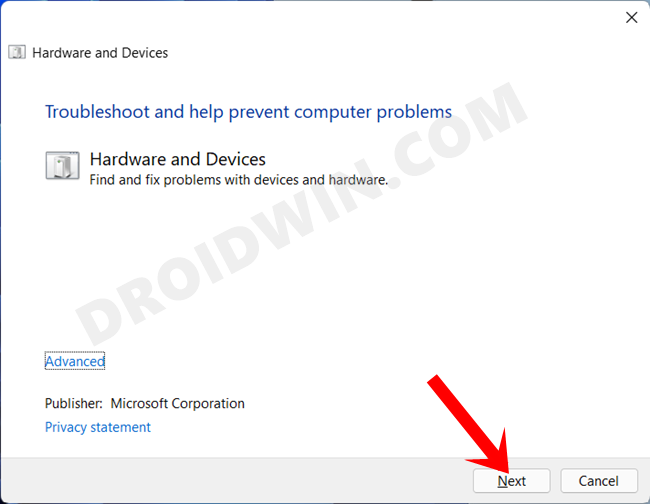
FIX 4: Use Windows Troubleshooter
Windows comes built-in with quite a few troubleshooter apps that scan for issues and bring out the related fixes. As for the current issue, we will be using the System Maintenance and the Hardware and Devices troubleshooters, as they are the best fit to resolve this bug.
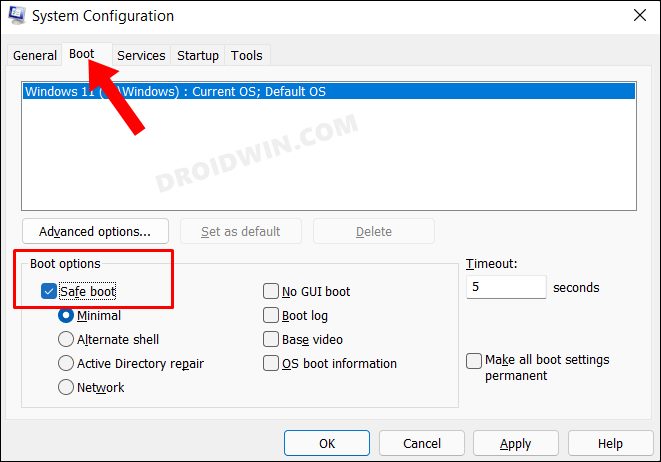
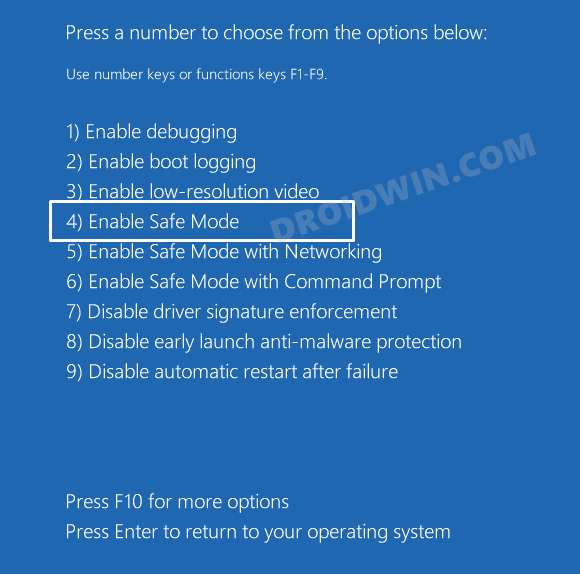
FIX 5: Boot to Safe Mode
In some instances, a third-party app might conflict with the OS functionality as well. The best way to verify and hence rectify this issue is to boot your PC to the Safe Mode. Doing so will disable all the third-party apps and give you the stock environment with just the system apps. If you are able to select multiple files in this mode, then the culprit is an app or software. Therefore, you should consider uninstalling the recently installed apps after which the issue first came to light. Here’s how:
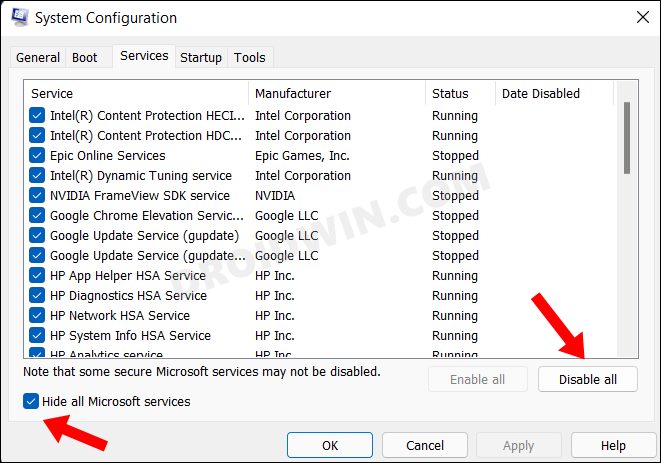
FIX 6: Disable Third-Party Service
A third-party service could also create a few roadblocks in the functioning of this feature. Therefore, you should consider disabling all the non-Microsoft-related services and then test out the results. Here’s how it could be done
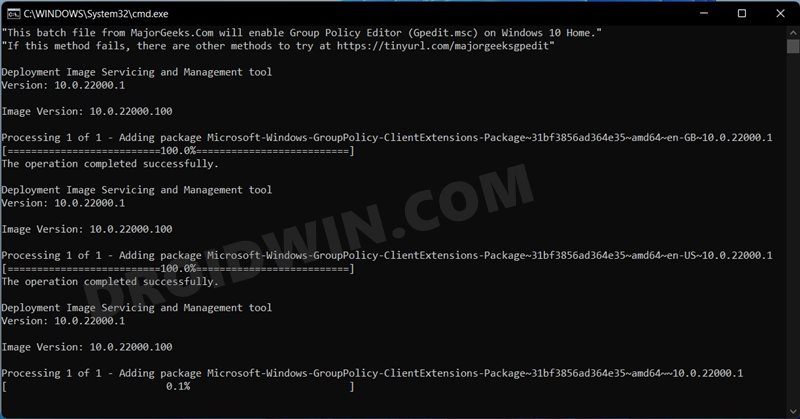
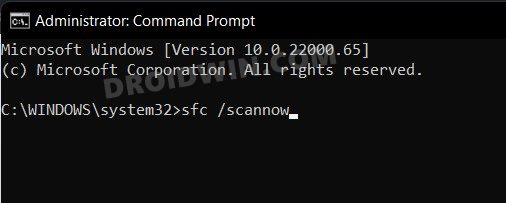
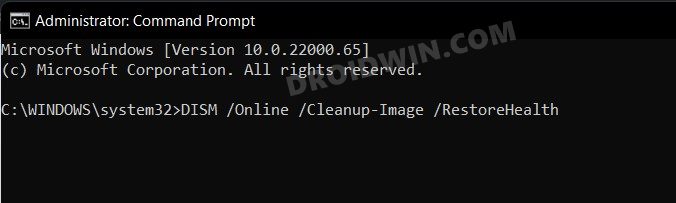
FIX 7: Use SFC and DISM Commands
System File Checker and Deployment Image Servicing and Management are two command-line utility tools that scan for corrupt Windows files and then replace them with their working counterpart. The major difference between the two is whereas the SFC replaces the corrupt files with the working ones from the cached directory on your PC, DISM does so by downloading the working files from the online Microsoft servers. And as of now, we would be making use of both these tools to fix the underlying issue.
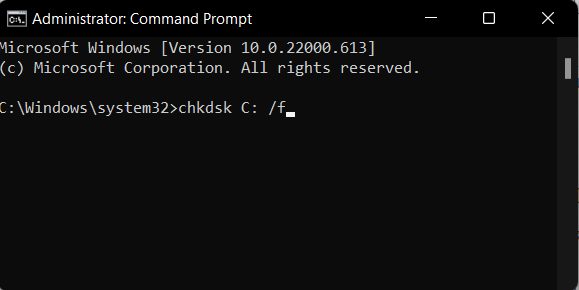
FIX 8: Run CHKDSK Command
If there are any bad sectors on your disk or if some system files have got corrupted, then it could result in the underlying issue that we are currently facing. In such cases, you could make use of the Check Disk command-line tool and get these issues rectified. Here’s how
FIX 9: Update/Reinstall Microsoft Visual C++
Microsoft Visual C is an important component upon which many system apps and OS components are dependent. So if there are any issues with its libraries, then its repercussions are bound to be faced with the associated system frameworks. To resolve it, you should consider updating it to the latest build or if that doesn’t work out, then reinstall them from scratch. Here’s how-
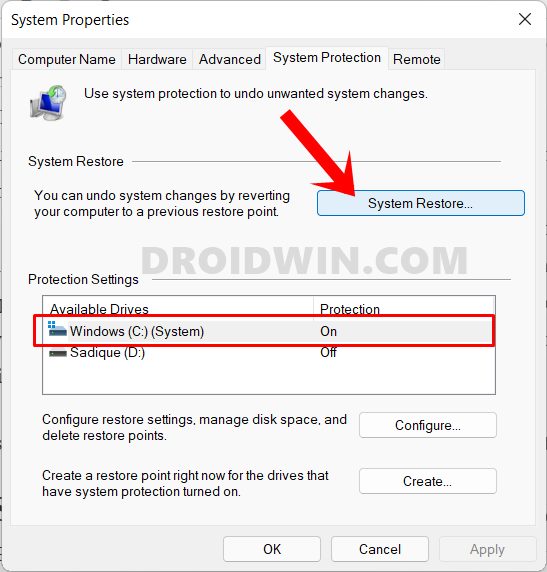
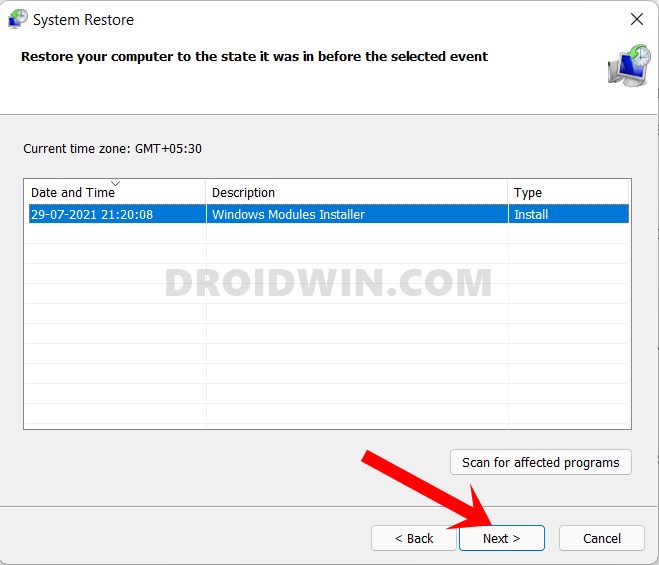
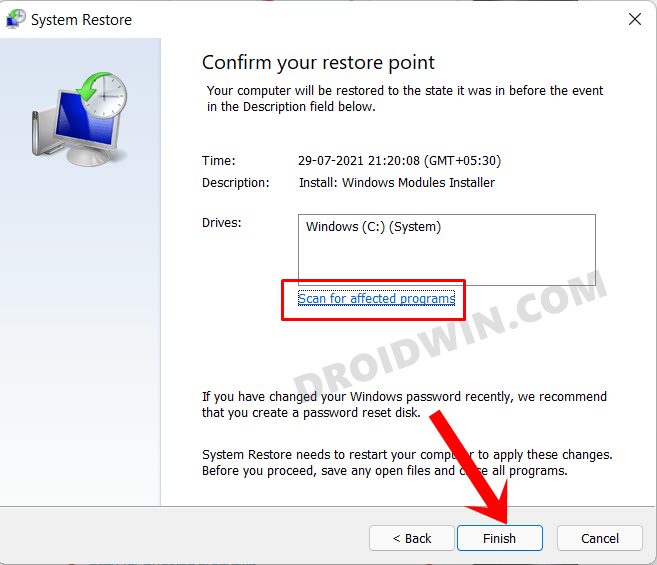
FIX 10: Use a Restore Point
If none of the aforementioned methods spelled out success, then you should consider restoring your system to an earlier point during which it was free from this issue. Here’s how it could be done So with this, we round off the guide on how you could fix the issue of the Local Group Policy Editor not working issue on your Windows 11 PC. We have listed ten different methods for the same. Do let us know in the comments section which one spelled out success for you. Likewise, all your queries are welcomed in the comments below.
Fix: Task Manager not opening or working in Windows 11Disable Let’s finish setting up your device screen in Windows 11How to Block Files, Folders, and Apps from being accessed in Windows 11How to Hide Items from the Settings menu in Windows [3 Methods]
About Chief Editor