From then, there was no turning back. Currently, the Pixel 3 series has well and truly captured the markets around the globe. The expectations of this device are always sky high. And the Silicon Valley Giants never seems to disappoint the masses. Not only does it scores exceptionally well on the hardware front, but its software is equally impressive. Being a Google product, it is always among the first device to receive the latest Android updates. But one thing for which this device is known is the amazing camera quality. It could be well and truly understood by the fact that now almost every other device has a Google Camera Port. Enough with the history, let us move on to the actual topic, shall we? Just follow the below-detailed guide on how to Unlock the Bootloader of Google Pixel Devices.
How to Root Google Pixel 5 via Magisk without TWRP (Android 11)Steps to Root Pixel 4, 4A, 4A XL running Android 11 without TWRPHow to Root Pixel 3, 3 XL, 3a, 3a XL Android 11 without TWRPHow to Root Pixel 2 and 2 XL running Android 11 without TWRP
How to Unlock Bootloader on Google Pixel Devices
The below instructions are listed under separate sections for ease of understanding. Make sure to follow in the exact same sequence as mentioned. Droidwin and its members wouldn’t be held responsible in case of a thermonuclear war, your alarm doesn’t wake you up, or if anything happens to your device and data by performing the below steps.
STEP 1: Take a Backup
Make sure to take a backup of all the data on your device. This is because the process will wipe off all the stored data.
STEP 2: Install Android SDK
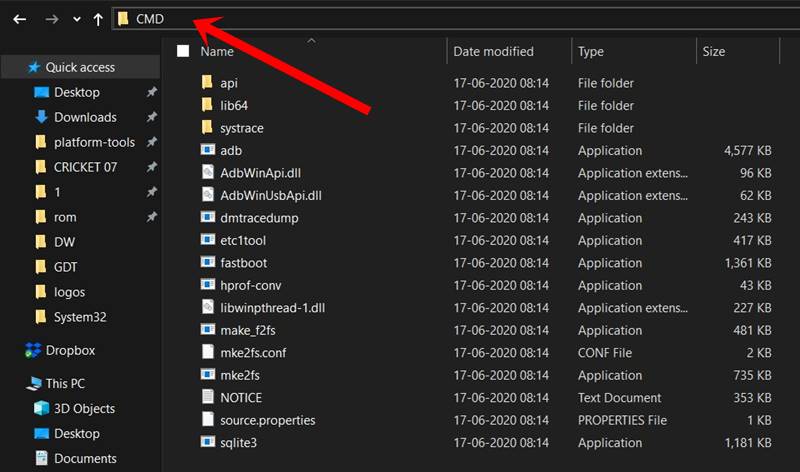
First and foremost, you will have to install the Android SDK Platform Tools on your PC. This is the official ADB and Fastboot binary provided by Google and is the only recommended one. So download it and then extract it to any convenient location on your PC. Doing so will give you the platform-tools folder, which will be used throughout this guide.
STEP 3: Enable USB Debugging and OEM Unlocking on Google Pixel Devices
Next up, you will also have to enable USB Debugging and OEM Unlocking on your device. The former will make your device recognizable by the PC in ADB mode. This will then allow you to boot your device to Fastboot Mode. On the other hand, OEM Unlocking is required to carry out the bootloader unlocking process.
So head over to Settings > About Phone > Tap on Build Number 7 times > Go back to Settings > System > Advanced > Developer Options > Enable USB Debugging and OEM Unlocking.
STEP 4: Boot Google Pixel Devices to Fastboot Mode
STEP 5: Unlock Bootloader on Google Pixel Devices
That is all from this guide on how to unlock the bootloader on Google Pixel devices. If you have any queries, do let us know in the comments section below.
Fix adb server version doesn’t match this client; killing.How to fix ADB Device not found [List of Devices Attached is blank]Detailed Steps to Fix adb is not recognized ErrorHow to Fix Unauthorized Device with ADB Commands [3 methods]
About Chief Editor

![]()

![]()
![]()
![]()
![]()