Moreover, some users have also reported that there are usually a few app compatibility issues as well. In this regard, the ones who have already installed the updates have to take the difficult route of downgrading to the earlier stable build. However, the users who haven’t yet installed the updates could carry on the older build until everything falls in place. But, it is proving to be easier said than done. Few of them have voiced their concern that the update automatically tends to get installed whereas others have reported that the constant update notification tends to disrupt their normal workflow. If you are also getting bugged with these issues, then this guide will make you aware of a couple of nifty workarounds to stop the automatic OS upgrades/updates on Android. Follow along.
How to Stop Automatic Android OS Upgrades
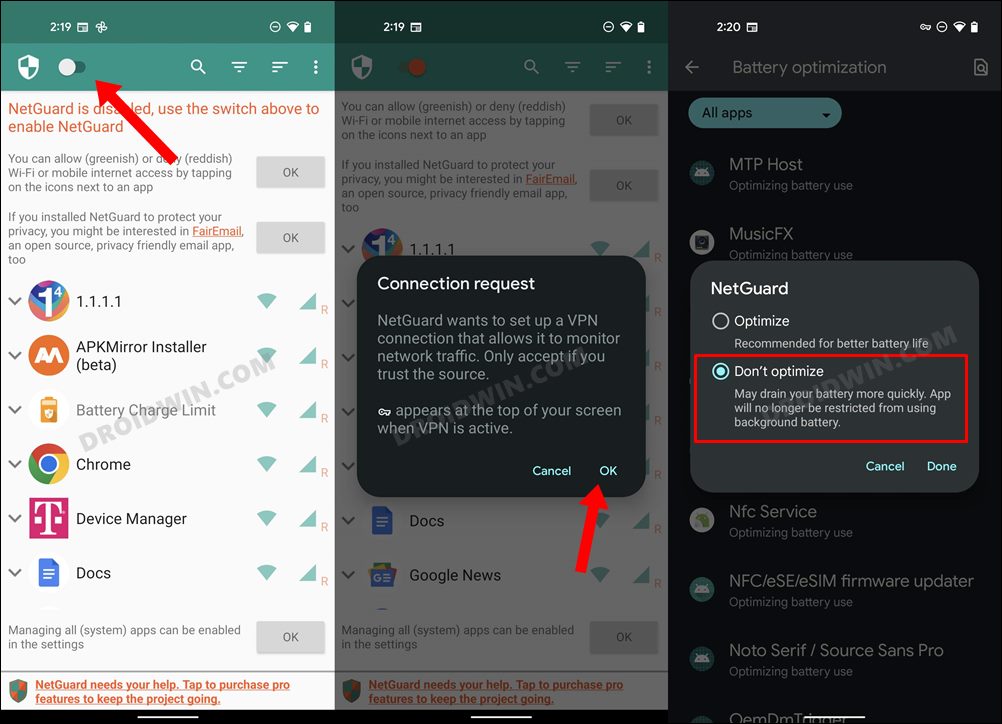
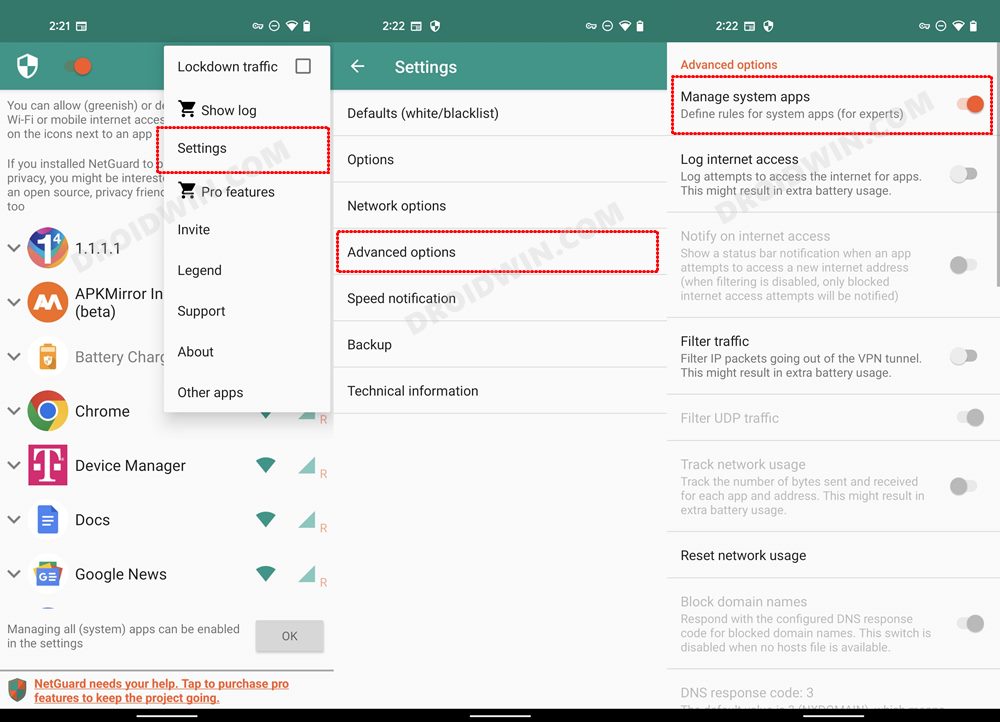
in order to carry out this task, we will be blocking the DNS and the IP Address of the update server. The second approach will be to create a proxy connection and then disable the network access to the system updater app. All this has been explained in depth below, so without further ado, let’s put it to the test right away.
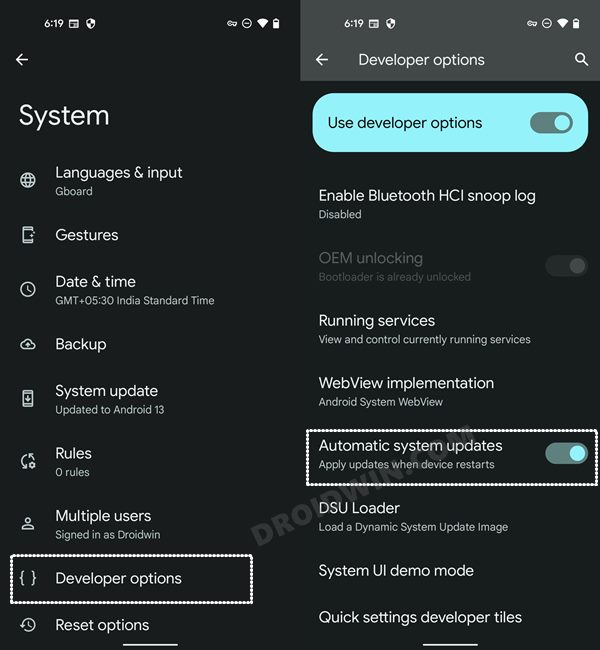
STEP 1: Disable Automatic System Updates
First and foremost, let’s disable the automatic system update functionality on your device. While we would anyways be blocking the network access for the updater app, but still, let’s be double sure and turn off the auto-updates as well. So refer to the below instructions to try it out-
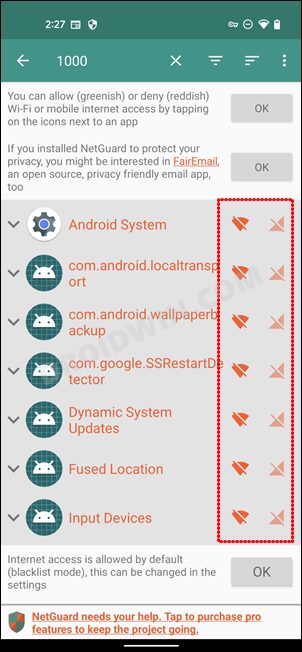
STEP 2: Disable Network Access for System Updater App
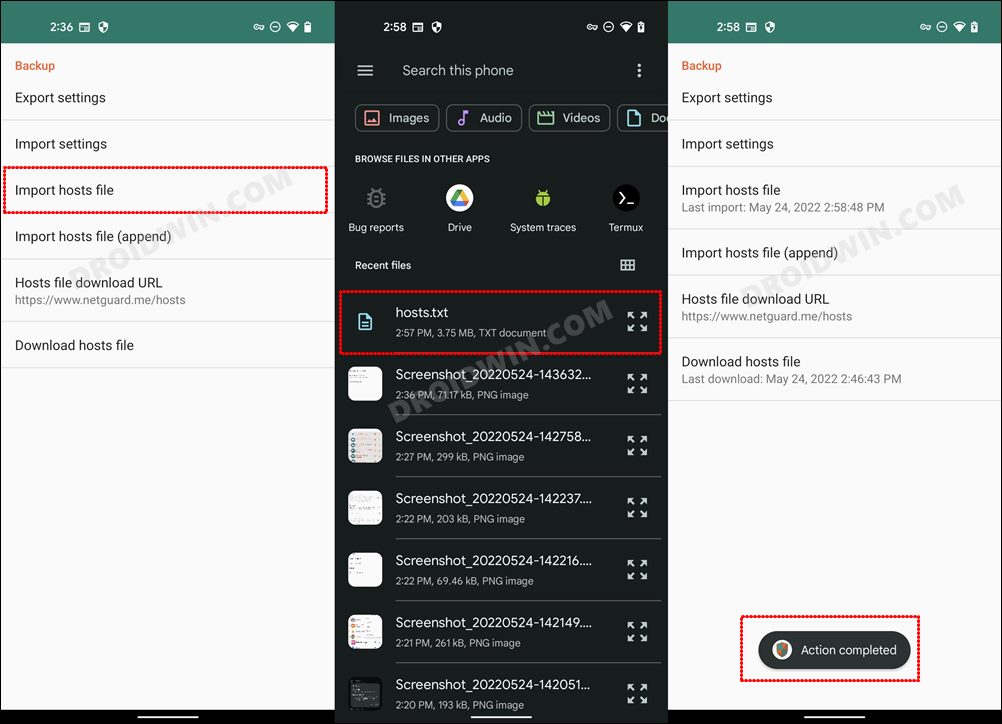
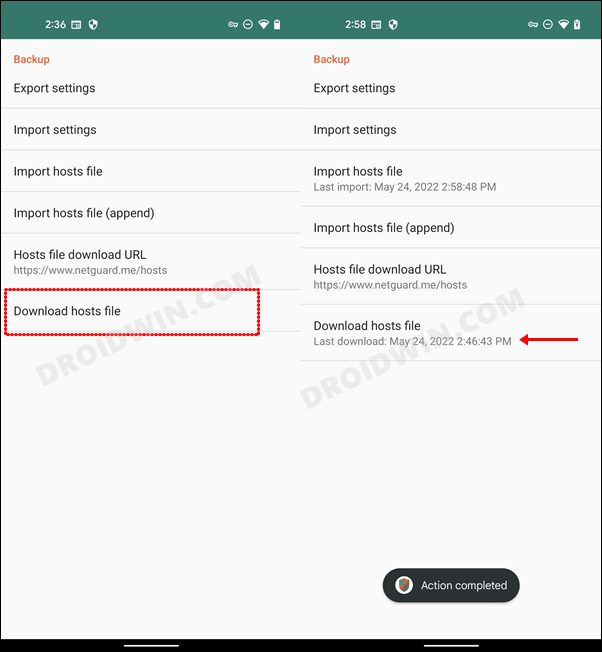
STEP 3: Block Update Server [via DNS Blocking]
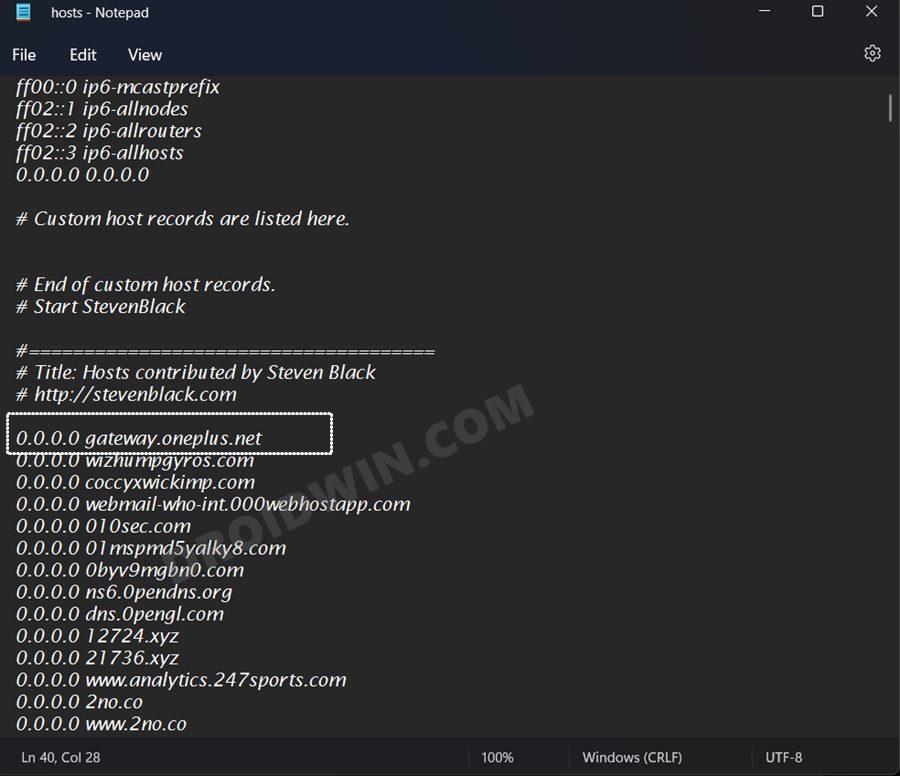
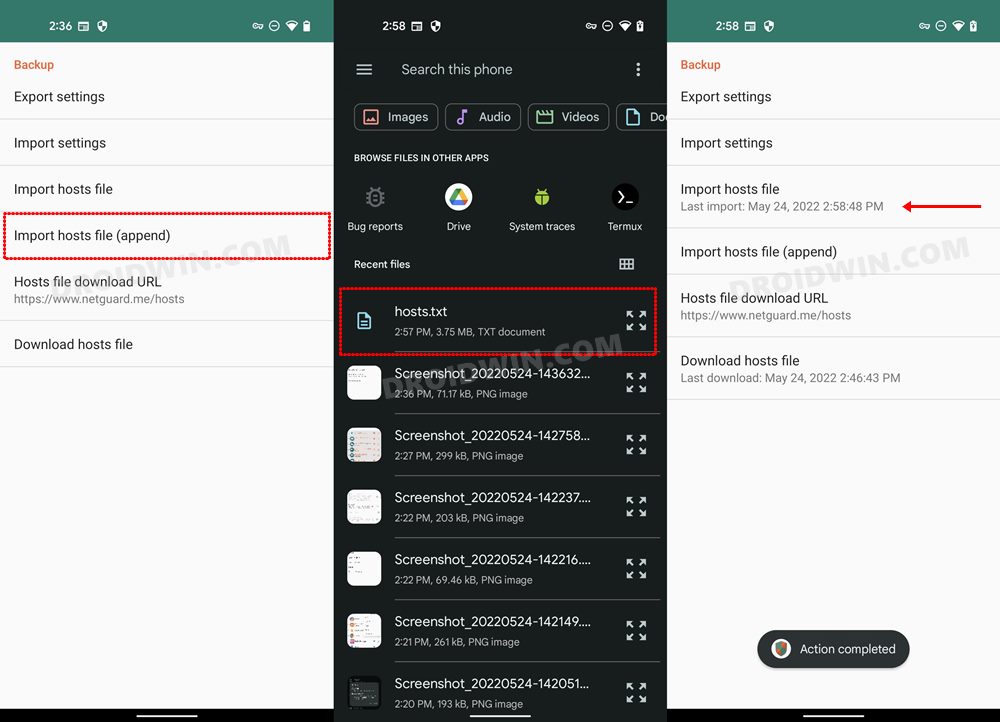
You will now have to get hold of the update servers which is used by the updater app, or in other words, from where the updates are being sent to your device. For example, in the case of OnePlus, the update servers are gateway.oneplus.net and open.oneplus.net [at least before its codebase got unified with Oppo’s ColorOS]. It’s not an issue if there is more than one server as you could easily add multiple servers to the block list.
METHOD 1
METHOD 2
If that doesn’t work out, then here’s an alternate approach that you could take-
How to Resume Automatic Android OS Upgrades
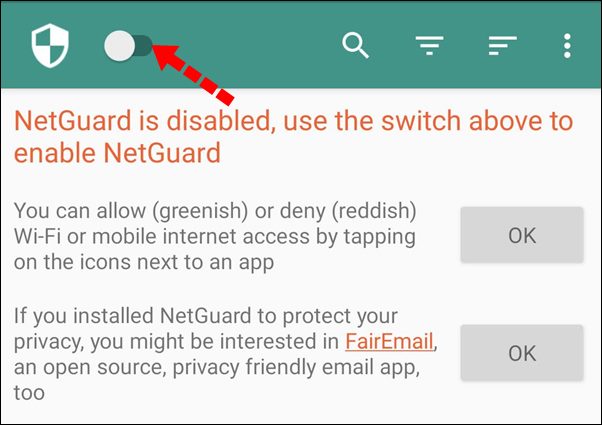
If at any point in time, you wish to revert the change and resume the update rollout, then launch NetGuard and disable the toggle at the top left. Or for a permanent fix, just delete the app from your device.
Alternatives to NetGuard
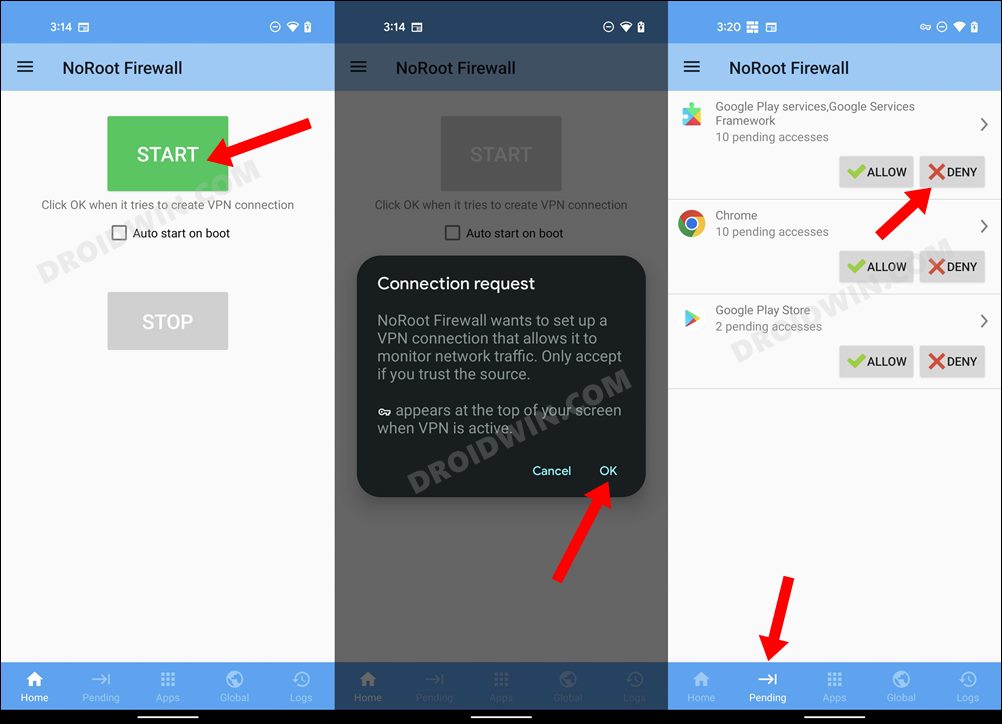
If NetGuard isn’t working along the expected lines or it didn’t give out the desired results, then you could try out apps like NoRoot Firewall or PCAP DROID. On the other hand, if you were blocking automatic OS upgrades on your device just because of compatibility issues with a few apps, then you don’t even need to take the technical route of blocking update servers. Rather, create a standalone environment for such apps using Island and then install the update. The apps part of that ecosystem wouldn’t be affected by this new update. So on that note, we round off the guide on how you could stop the automatic OS upgrades/updates on your Android device. If you have any queries concerning the aforementioned steps, do let us know in the comments. We will get back to you with a solution at the earliest.
How to Block Websites via Hosts file in Windows 11Block IP Address via Windows Defender Firewall in Windows 11How to Block Files, Folders, and Apps from being accessed in Windows 11Fix OnePlus: The version of your selected package is lower
About Chief Editor
