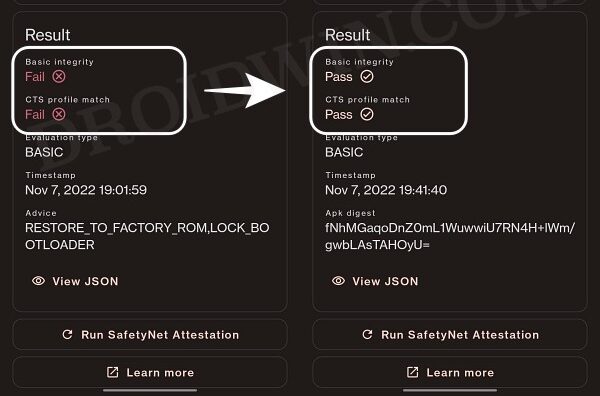
But on the flip side though, the SafetyNet will be tripped. As a result of this, you wouldn’t be able to use any banking and payment apps and games like Pokemon Go might not function either. Likewise, streaming DRM content like Netflix might also prove to be quite challenging. To overcome these limitations, all that you need to do is pass the SafetyNet on your rooted Redmi Note 12 Pro/Pro+ 5G. And in this guide, we will show you how to do just that. Follow along.
How to Pass SafetyNet on Rooted Redmi Note 12 Pro/Pro+ 5G
The below instructions are listed under separate sections for ease of understanding. Make sure to follow in the exact same sequence as mentioned below. Droidwin and its members wouldn’t be held responsible in case of a thermonuclear war, your alarm doesn’t wake you up, or if anything happens to your device and data by performing the below steps.
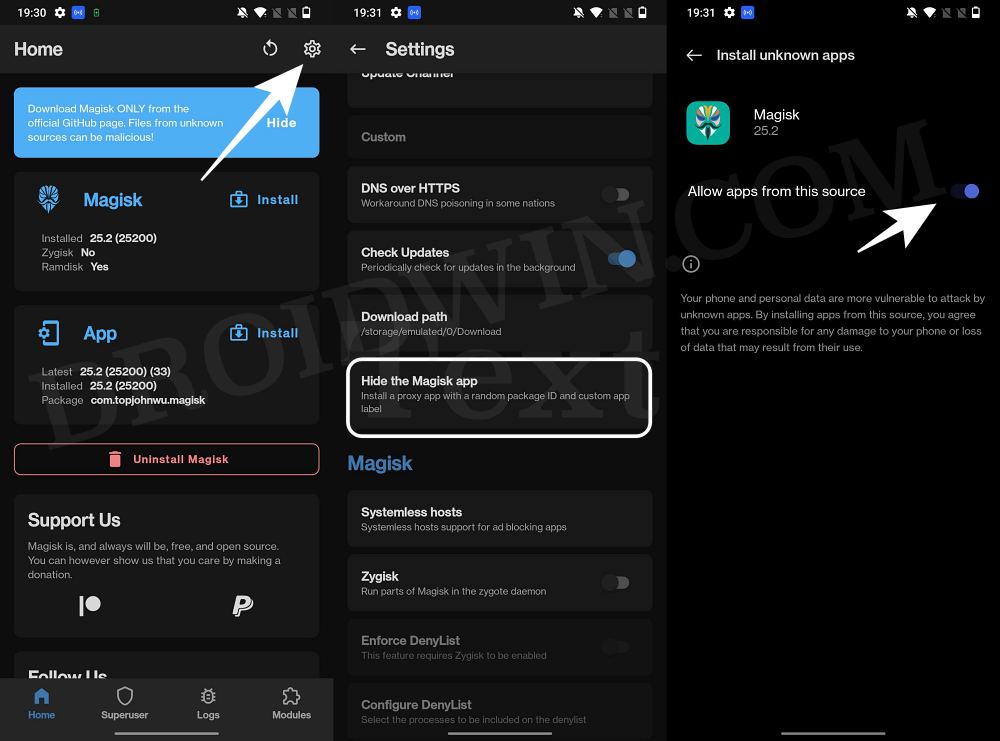
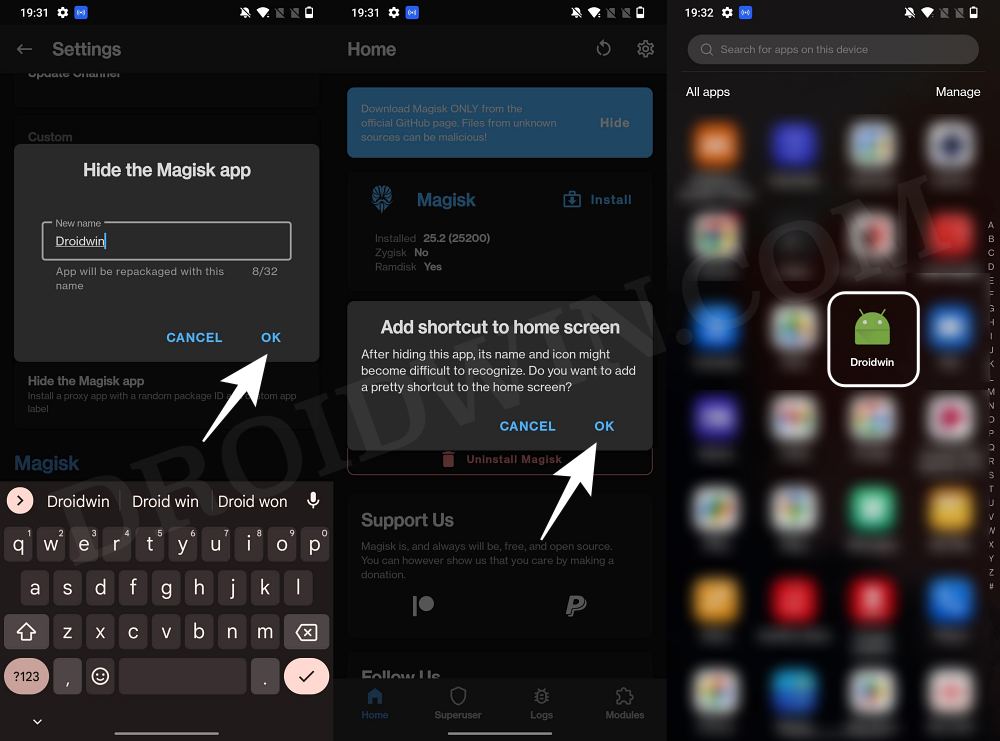
STEP 1: Hide Magisk App
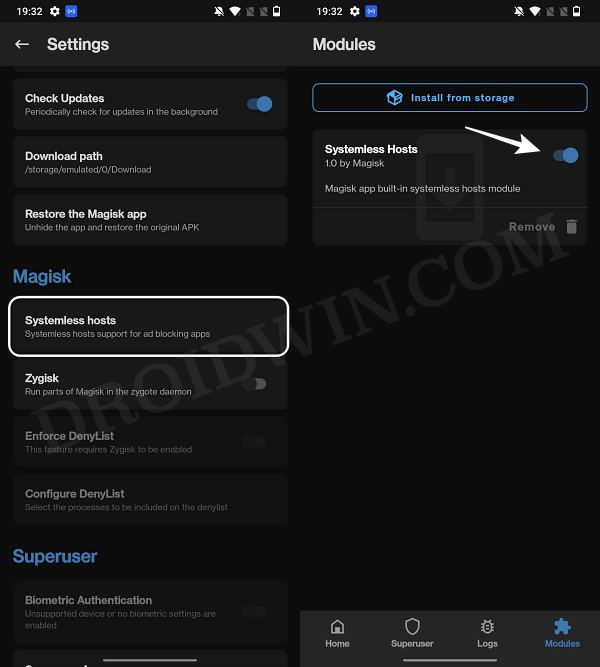
STEP 2: Enable Systemless Hosts
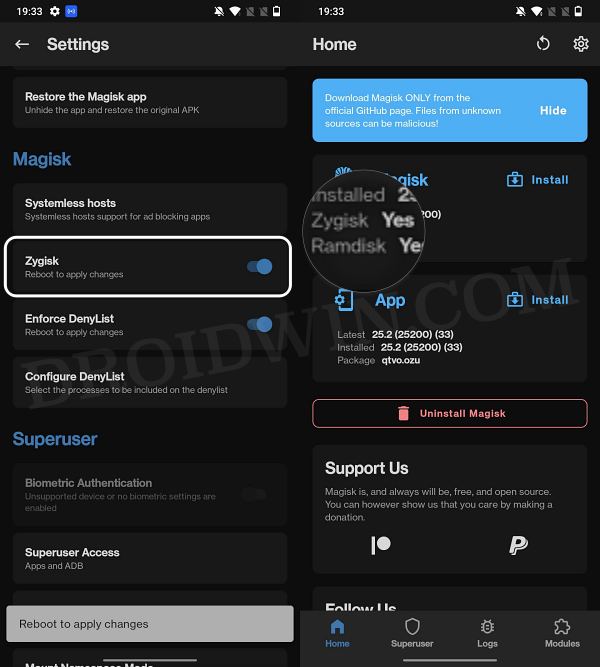
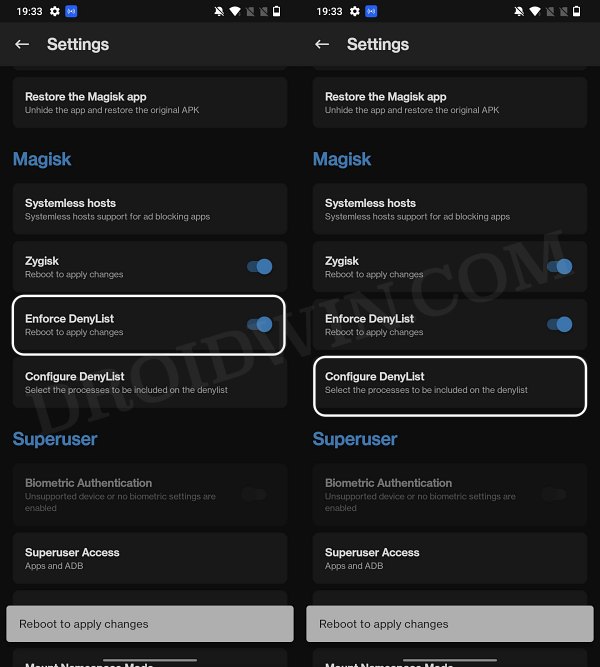
STEP 3: Enable Zygisk
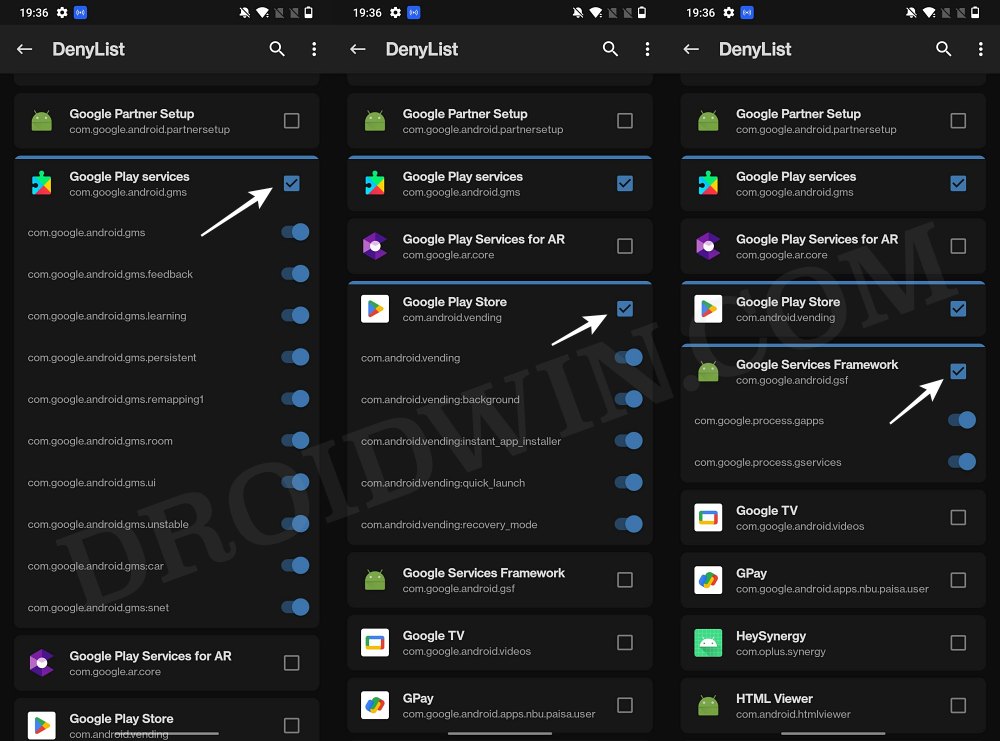
STEP 4: Configure Denylist
Denylist is the new name for the traditional Magisk hide. You could use this functionality to hide root from the desired apps, apart from the three compulsory apps listed below.
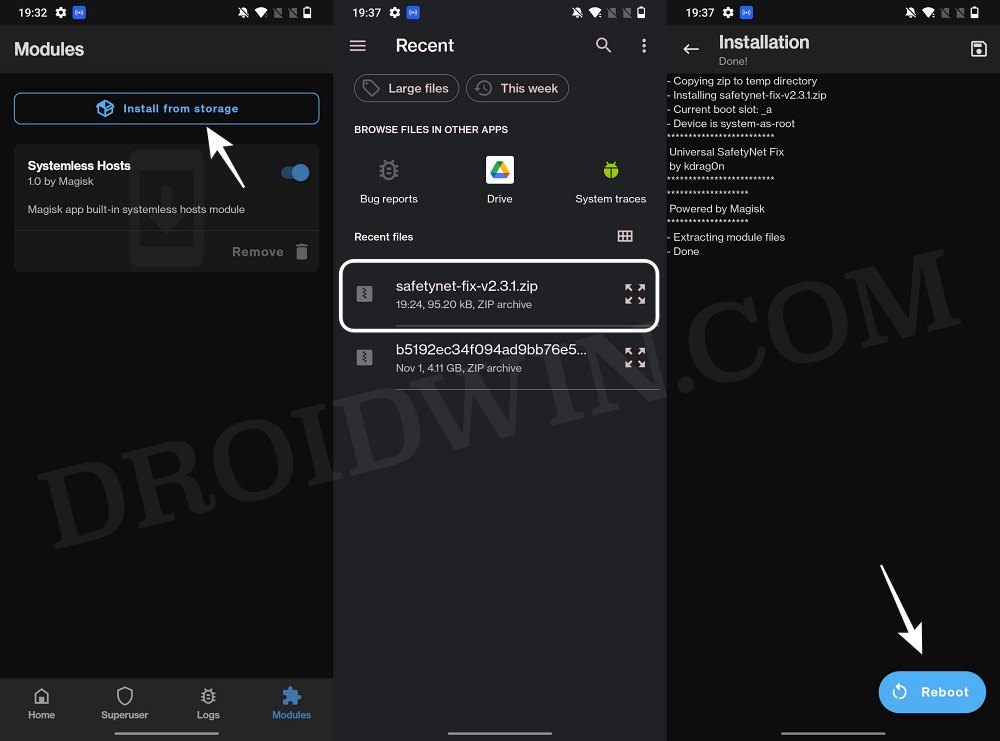
STEP 5: Flash Universal SafetyNet Fix Module
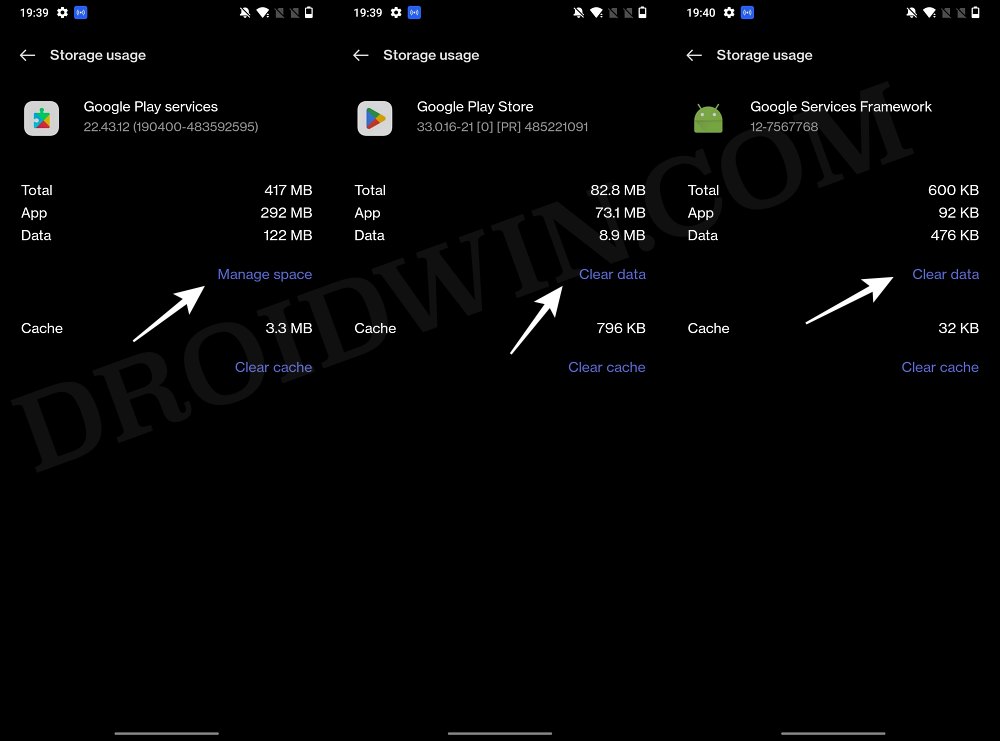
STEP 6: Delete Data
You will now have to delete the app data of all the apps from which you have hidden root. These include the compulsory Google apps and the desired apps of your choice.
STEP 7: Check SafetyNet Test Results
That’s it. these were the steps to pass SafetyNet on your rooted Redmi Note 12 Pro/Pro+ 5G. If you have any queries concerning the aforementioned steps, do let us know in the comments. We will get back to you with a solution at the earliest.
How to Pass the SafetyNet test after installing Xposed or EdXposedFix Magisk Safetynet API Error: Detailed GuideHow to Fix ctsProfile Mismatch Error on Rooted AndroidBootloop after installing/updating Magisk: How to Fix
About Chief Editor
