Under the hood, you get an octa-core Exynos 9606 chipset (yes, Samsung isn’t the only one with Exynos) and Mali-G72 MP3 GPU. It comes in a single variant- 128GB 4GB RAM with expandable storage support. The triple rear camera (12+16+5MP) and a single 12MP camera could be called decent at its best. To support all these features, you get a 3500 mAh battery. The only issue one could recall with this device is its unresponsive touch issues (FIXED!), especially while it is charging. Anyways, while the device offers value for money, but the specs sheet is just one aspect. You could also get your hands on a plethora of custom developments, and in this guide, we will be sharing just that. So without further ado, here are all the required steps to install TWRP Recovery and root the Motorola One Action. A/B Partition Guides
[GUIDE] Flash ROMs/Magisk/TWRP/Kernels on A/B Partition DevicesHow to Flash Various Files in A/B Partition DevicesInstall Custom ROMs on any Android Device- Includes A/B PartitionHow to Fix FAILED (remote: unknown command) Error
How to Install TWRP Recovery and Root Motorola One Action
Most of our readers might already be aware of the perks of installing the TWRP Recovery and gaining administrative privileges via root. So we wouldn’t be discussing more on that. However, what all the readers might really be interested in are the steps to install this recovery and hence obtain root. So here is the ting. While the official TWRP is already available for One Action, but there are a lot of issues with that build.
Well, even the instructions given on that page aren’t giving out the desired results. But developers over at XDA have compiled a working TWRP recovery for Motorola One Action that does its job pretty well. There are no issues as such with the build and I have personally tried it on my One Action. So without further ado, let’s get on with the guide. Keep in mind that the steps are somewhat different than what you might have done until now. Proceed with the steps very carefully and at your own risk.
Don’t Miss: How to Install Stock Firmware via Fastboot Commands on Motorola One Action
STEP 1: Prerequisites
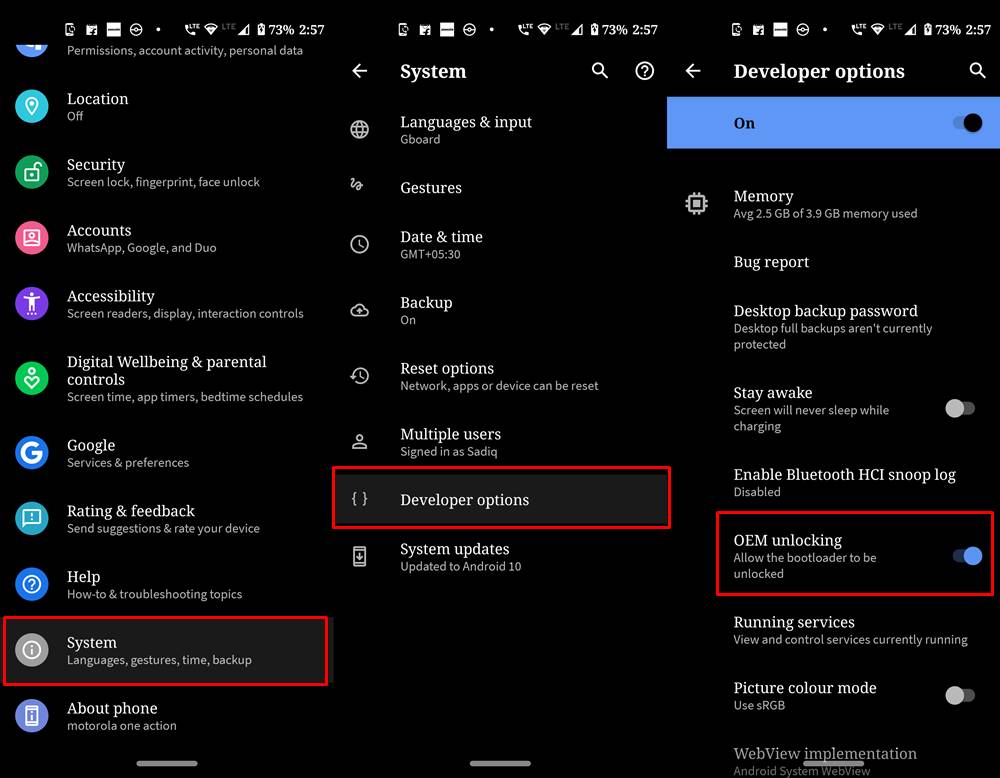
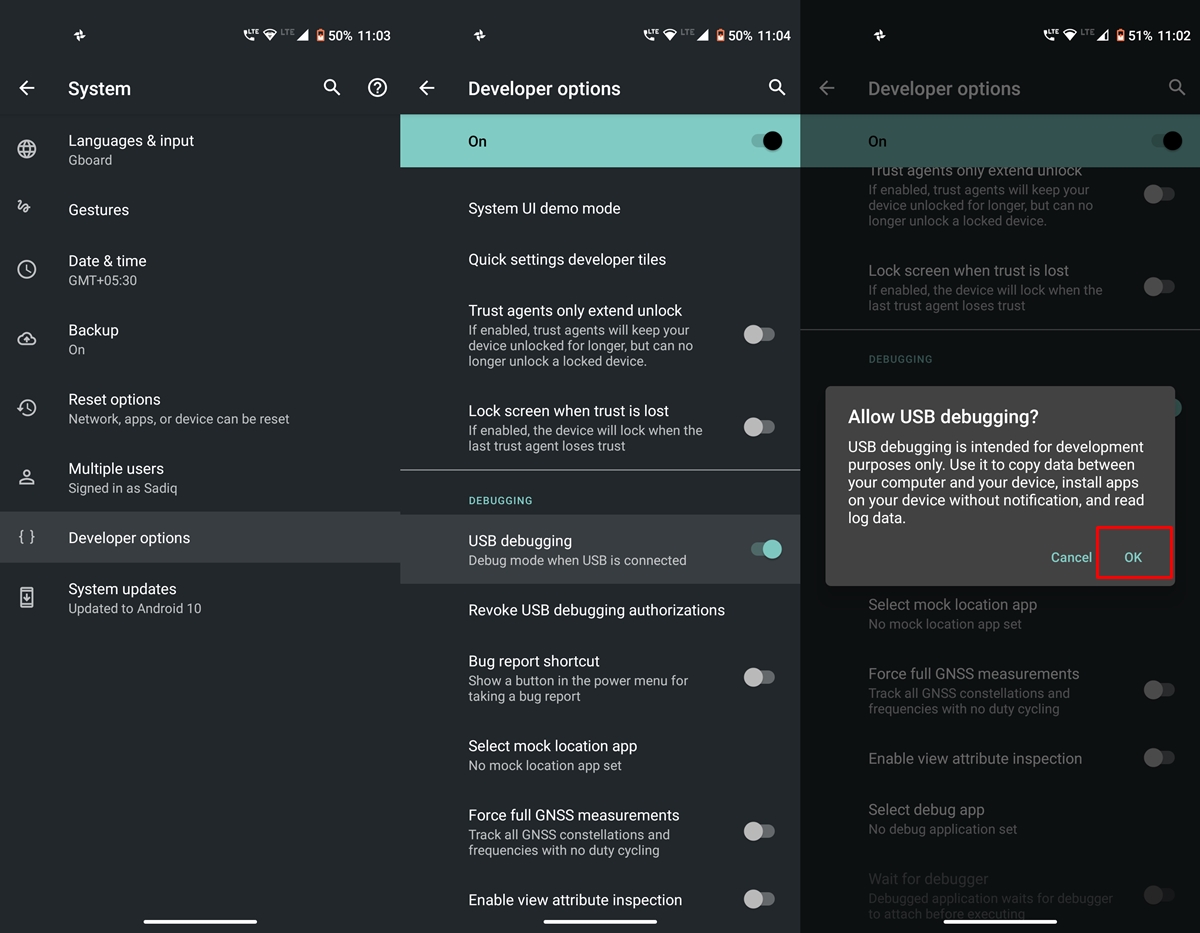
Create a complete device backup. This is because we will have to format the data partition later on in this guide.Also, enable USB Debugging as well as OEM Unlocking. The former will be needed to execute ADB Commands while the latter will allow for the bootloader unlocking process. To enable both these options, head over to Settings > About Phone > Tap on Build Number 7 times > Go back to Settings > System > Advanced > Developer Options > Enable both the USB Debugging as well as OEM Unlocking toggle.
STEP 2: Download the Required Files
To begin with, download and install the Android SDK Platform Tools. This will supply us with the necessary ADB and Fastboot binaries.Then, download the Magisk Installer ZIP file.Next up, download the TWRP Recovery for your Motorola One Action. We would like to thank XDA Recognized Developers @Stricted and @deadman96385 for this TWRP build.Also, download the patched vbmeta file as well as the Disable_Dm-Verity_ForceEncrypt.zip file. Credits to XDA senior member tys0n for these files as well as laying out the instructions for the same over at the XDA forum.We would recommend you take a copy of all these files and place them onto the Memory Card. We aren’t recommending to place it to your Internal storage as they will have to wiped twice or thrice during the entire process.
TWRP GUIDES
How to Install OTA Updates in Rooted Android DeviceHow to Permanently Install TWRP without TWRP ZIP File (only using TWRP.img file)Root Android Devices Without TWRP RecoveryHow to Fix TWRP Error 7 (While Flashing Custom ROM via TWRP)
STEP 3: Unlock Bootloader
To begin with, unlocking the bootloader is the first gateway that you need to pass. So refer to our detailed guide on How to Unlock the Bootloader on any Motorola Device.
Once your device boots up after the unlocking process, you will have to set it up via your Google account. But we would advise you not to do it now as later on, we would again have to format the data partition. So skip through the entire login, lock screen, and other such processes. Just enable Developer Options and USB Debugging from the Settings menu.
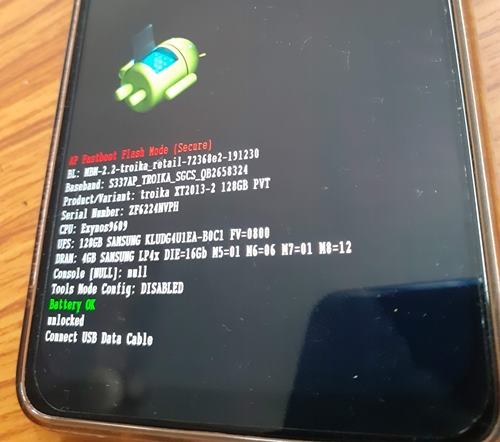
STEP 4: Boot Device to Fastboot
Magisk Guides
[GUIDE] Flash ROMs/Magisk/TWRP/Kernels on A/B Partition DevicesEverything About Magisk- Manager, Modules and MoreBest Magisk Modules of 2020 [PART-1][3 METHODS] Unroot any Android Device-Uninstall Magisk
STEP 5: Install TWRP Recovery on Motorola One Action
STEP 6: Permanent Installation of TWRP
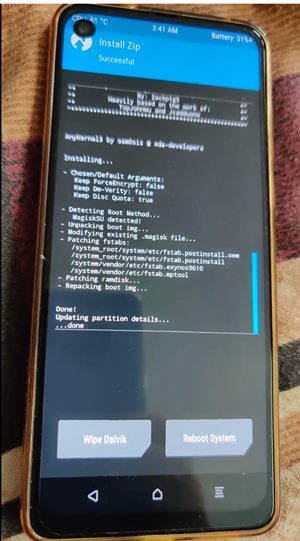
STEP 7: Root Motorola One Action
Android Tips and Tricks
How to Disable Screenshot Captured Notification and Sound without RootHow to Watch Netflix in HD on Rooted Devices ( Get Widevine L1 Support )Enable USB Debugging on a Broken Android Device’s Screen? Here’s a WorkaroundHow to Go Back to Stock ROM from GSI ROM (All Android Devices)
Concluding Remarks
With this, we conclude the guide on how to install TWRP Recovery and root Motorola One Action. Once your device boots, you will have to sign in with your Google Account and set it up. Furthermore, every time your device reboots, you will see a Bootloader Unlock Warning message. I am looking for ways to overcome this. Though it isn’t on top of my priority list as there is no issue with that message. With that said, if you have any queries with respect to any of the aforementioned steps, do let us know in the comments section below. We will get back to you with the solution as soon as possible.
About Chief Editor


