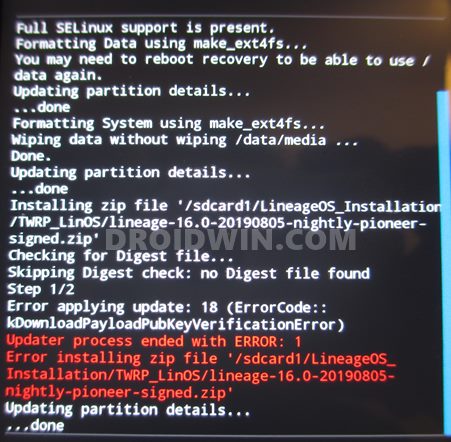
At the very most, you could wipe off the data, reboot your device to Fastboot, or in some instances, perform the ADB sideload functionality. But that’s it. You cannot flash ZIP or IMG files, erase data partition, create and restore a backup of various device partitions, etc. Hence the need for a custom recovery becomes all the more important. And as of now, TWRP is the sole recovery ruling the charts. While there are others as well, but they are build using the TWRP’s source code. However, this recovery isn’t free from its fair share of issues. For example, you might get TWRP Error 7 while flashing custom ROMs or TWRP Error 20 after flashing GApps. Then there are instances of users facing TWRP Error 70 due to insufficient storage in the System partition. And now, there have been numerous complaints from users getting bugged with the TWRP Error 1. If you are also facing this issue, then fret not. This guide will list out two different methods to fix this TWRP Error 1 once and for all. Follow along.
The Reason for TWRP Error 1
The reason for this issue is due to the corrupt boot.img file. Well, we aren’t talking about the stock boot image file, rather it’s the patched boot img file that we use for rooting purposes. For the unawares, there exist two different methods to root any device. In the first one, you could directly flash the Magisk ZIP Installer file via TWRP and your device stands rooted. The next method requires getting the stock boot.img file, patching it via Magisk and then flashing it via Fastboot commands.
However, there is an important point worth keeping in mind. You will have to use the same boot.img file from the firmware that corresponds to the current firmware installed on your device. Any mismatch in the version would lead to a conflicting situation and could lead to a few issues, one of which is TWRP Error 1. So how could this be rectified? Well, you would have to patch and flash the correct boot.img file and it will fix the TWRP Error 1. Here are all the required instructions for the same.
How to Fix TWRP Error 1
So here’s how the entire process will be carried out. First off, we will be flashing the stock boot.img file onto your device. This will remove the root from your device (if you are already rooted). Once that is done, we will take this stock boot.img file, patch it via Magisk, and flash it via Fastboot Commands. Droidwin and its members wouldn’t be held responsible in case of a thermonuclear war, your alarm doesn’t wake you up, or if anything happens to your device and data by performing the below steps.
STEP 1: Download Stock Boot IMG
First and foremost, you will need the stock boot.img file corresponding to the firmware version installed on your device. You could check the current firmware build number from the About Phone section. Once you have verified the same, download the corresponding firmware file (stock or custom ROM whichever is currently installed).
Now if you are having a Pixel device, then you could easily extract the firmware via WinZIP or WinRAR. But that isn’t the case with other devices. In the case of OnePlus, the partition image files are placed inside payload.bin. Whereas Oppo and Realme have their files inside the OZIP package, so you would need standalone tools for this purpose. In this scenario, you may refer to our detailed guide linked below:
How to Extract payload.bin and get the stock boot image fileHow to Extract OZIP Realme Stock ROM (Firmware)
Once you have got hold of the stock boot.img file, proceed to the next step to fix the TWRP Error 1.
STEP 2: Flash Stock Boot.img file via TWRP
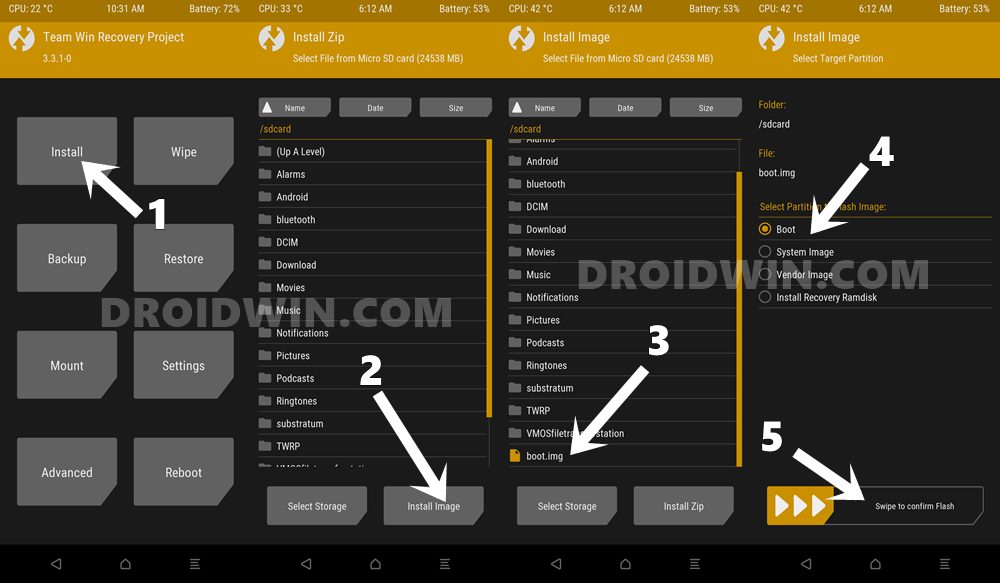
The next step in the guide to fix the TWRP Error 1 requires you to install the stock boot.img file onto your device. While we could do so via Fastboot Commands, but since TWRP is already installed, let’s take this approach only. Do keep in mind that if your device is rooted, then it will be unrooted on flashing the stock boot.img (don’t worry we will re-root it later on as well).
STEP 3: Patch Stock Boot.img via Magisk
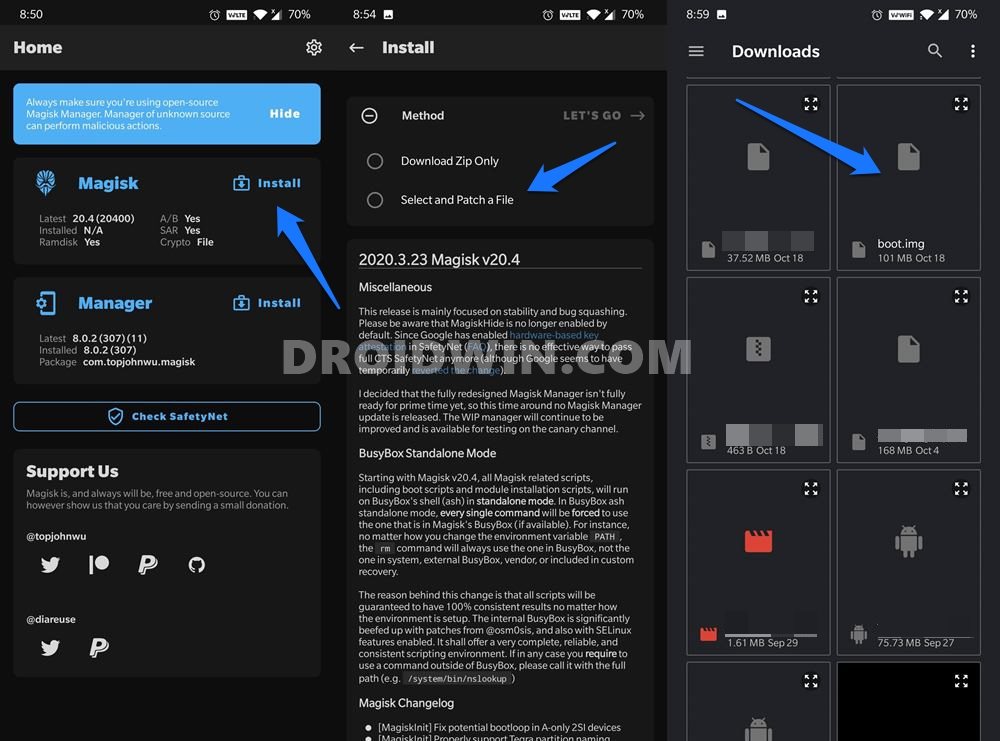
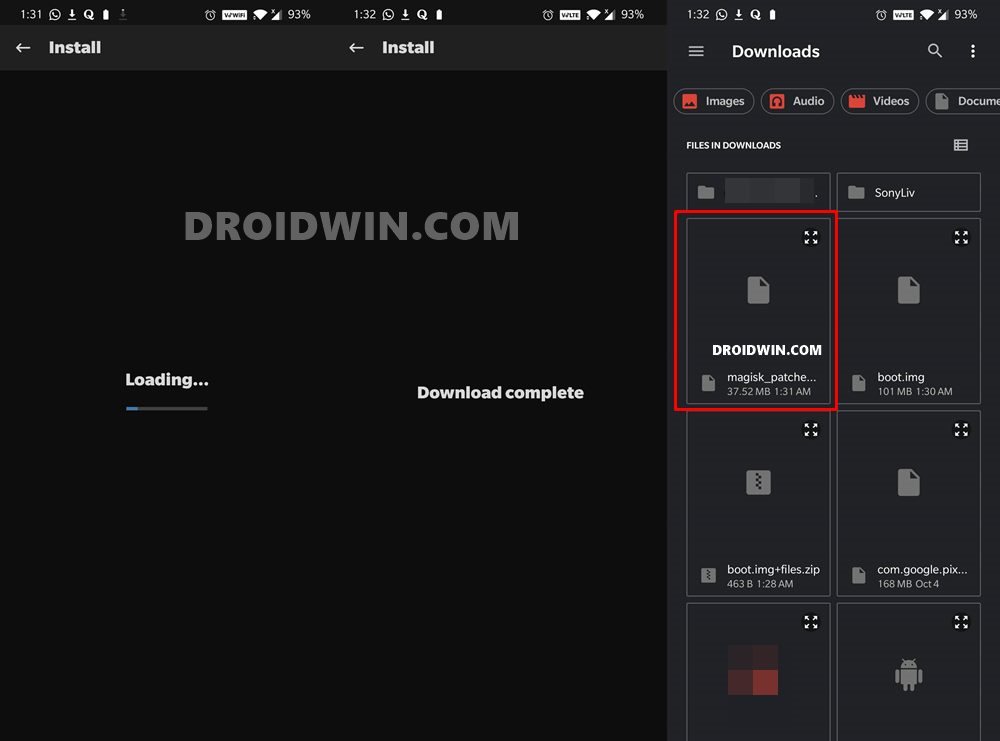
In this section, we will be patching the stock boot.img file via Magisk. This will give us the magisk_patched.img file which will then be flashed onto your device. So follow the below steps to carry out this task. Make sure that the stock boot.img file is transferred to your device. [Having trouble on your Android 11 device? Check out this guide: Fix Magisk patched boot.img issue while Rooting Android 11]
STEP 4: Flash Patched Boot.img via TWRP
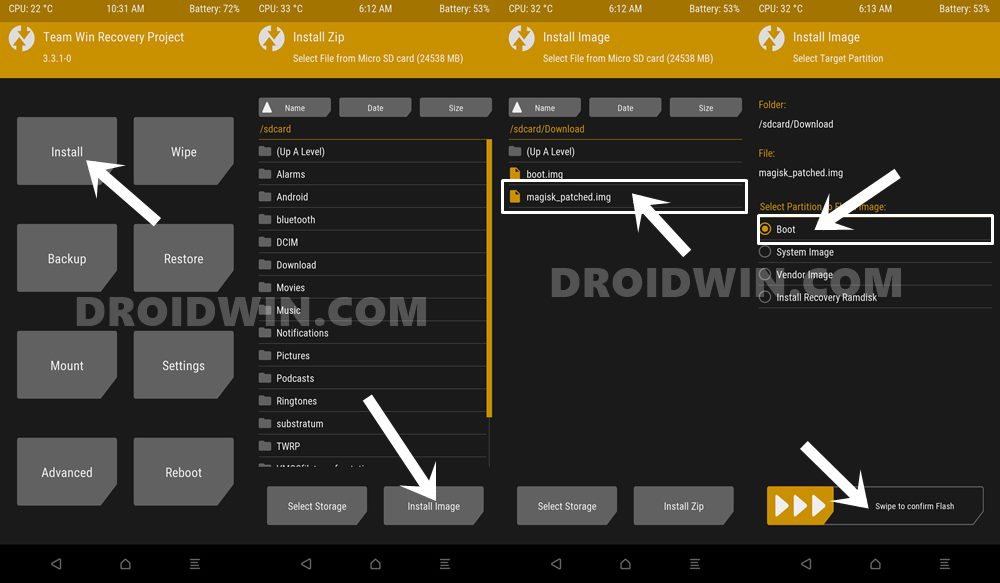
Finally, you just need to flash this patched boot.img file to your device. Again, there are two different approaches for the same, but since TWRP is the easier method than compared with Fastboot Commands, we will be using this method only. Make sure that you have the magisk_patched.img on your device:
That’s it. The process stands complete. With this, we conclude the guide on how to fix TWRP Error 1. If you still have any queries concerning the aforementioned steps, do let us know in the comments. We will get back to you with a solution at the earliest.
About Chief Editor
![]()
