Hence this is where a custom recovery like TWRP comes into the picture. Using it, you could create and restore Nandroid backups, flash IMG, and ZIP files and carry out other advanced functionalities. However, from time to time, it might throw up a few errors as well. And the issue of TWRP showing Internal Memory as 0MB seems to be the most common one. Furthermore, this error isn’t anything new. Rather I have seen forums dating back to around 6-7 years where users have voiced their concerns about this issue. So if you are also facing this issue, then this guide is here to help you out. Given here are four different methods to fix the TWRP 0MB Internal Memory issue. Likewise, we will also make you aware of the reason why this issue is happening in the first place. So without further ado, let’s start with the guide.
How to Update TWRP Recovery on any Android DeviceTWRP: fastboot flash vs fastboot boot: Which command to useHow to Replace LineageOS Recovery with TWRPHow to Root Android Devices via TWRP Recovery
Why TWRP Shows Internal Memory as 0MB?
To prevent unauthorized access to the data stored on your device, the data partition is encrypted by default. While it is among the most stringent security measures, yet it might cause a few issues as well. In some instances, the TWRP Recovery on your device might not be able to access the data partition on your device and would rather show the total occupied space as 0MB. Along the same lines, TWRP might also show all your files renamed to some random string of characters.
The reason for both these issues is the same: TWRP is not able to read the files stored on your device. While this issue is mostly persistent with unofficial or test builds or TWRP, you might come across some instances of this issue in the official build as well. With that said, fortunately there do exists a few methods to fix the TWRP 0MB Internal Memory issue. And in this guide, we have shared all the four methods to rectify this issue once and for all. Follow along for the detailed instructions.
How to Fix TWRP 0MB Internal Memory Issue
Before we list out the instructions, there are a few prerequisites that you need to check-mark. Make sure that you go through each of these requirements and only then proceed with the fix.
Prerequisites
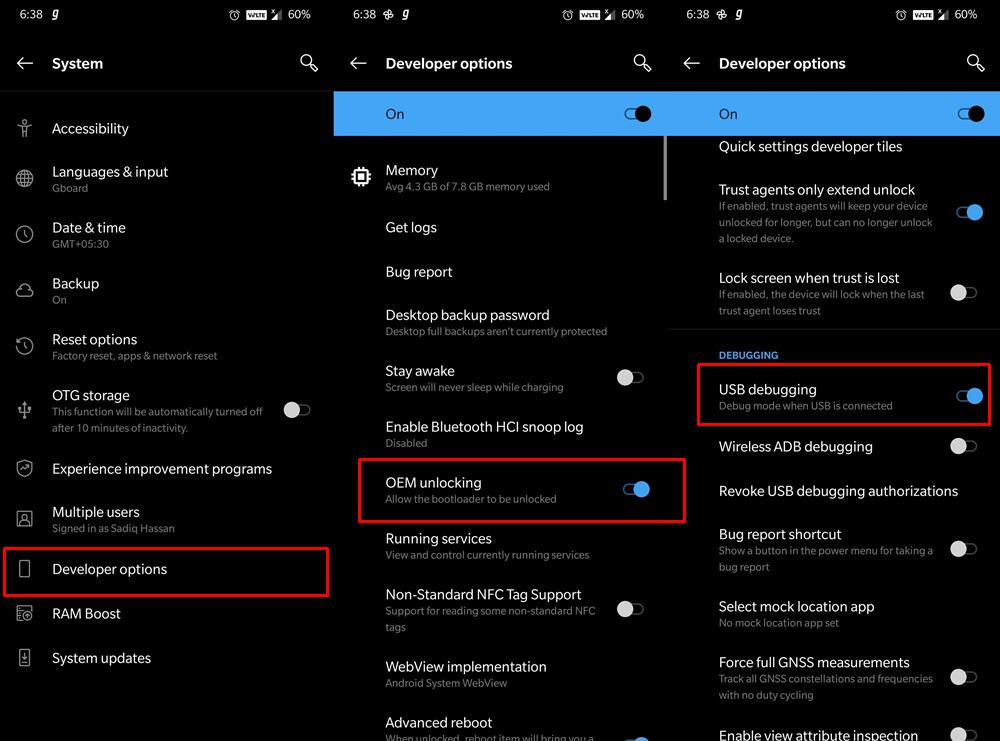
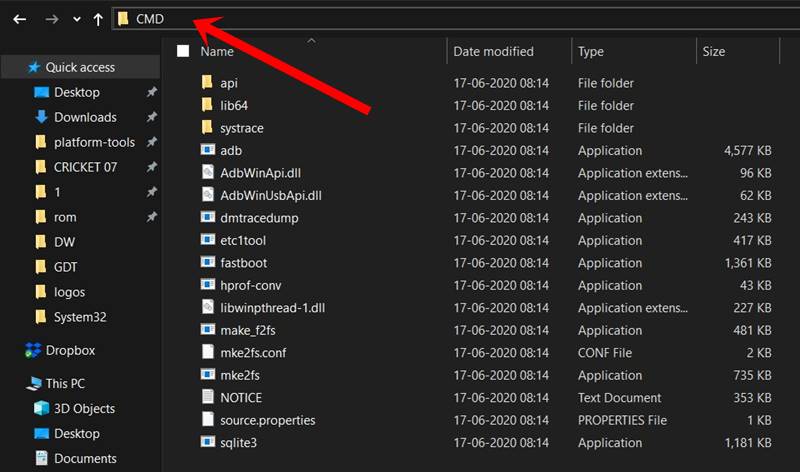
First and foremost, take a complete device backup. This is because three out of the four fixes [Fix 2,3 and 4] given below will wipe off all the data from your deivce. So having a backup beforehand is a must.Furthermore, it is recommended that you don’t take a Nandroid backup. This is because backup might contain only the encrypted data and upon restoring it, you will be back to encrypted data again. Hence you should take a backup from Settings > System > Backup.Next up, install Android SDK Platform Tools on your PC. This will provide you with the necessary ADB and Fastboot binaries.If at any point in time, you need to boot your device to TWRP, then here is what needs to be done:Connect your device to PC via USB cable. Make sure USB Debugging is enabled. Then head over to the platform-tools folder, type in CMD in the address bar, and hit Enter. This will launch the Command Prompt. Type in the following command in the CMD window to boot your device to TWRPadb reboot recovery
That’s it. These requirements will suffice as of now. You may now proceed with the steps to fix the TWRP 0MB Internal Memory issue.
How to Fix TWRP Error 70 [With Screenshots]How to Fix TWRP Error 20 GApps after flashing LineageOSFix TWRP Error 7 (While Flashing Custom ROM via TWRP)How to Fix fastboot: error: Couldn’t parse partition size ‘0x’
FIX 1: Switch from Pattern Lock to PIN/Password
This is one surprising hack that I recently found. The plus side of this trick is it doesn’t require any formatting of data and could be executed within seconds. On the flip side, this trick is mostly known to work only on older Android devices (the last device on which I was able to successfully make this trick work was Nexus 6). Anyways, even if you have a newer Android device, there’s no harm in trying out this tweak. As is evident from the heading, this method requires you to change the device lock from a Pattern Lock to a Pin or Password. The reason for the same is that TWRP doesn’t natively support Pattern lock, however, you could easily type in the numbers in TWRP and carry out the Password or Pin Unlock.
FIX 2: Format Data via TWRP
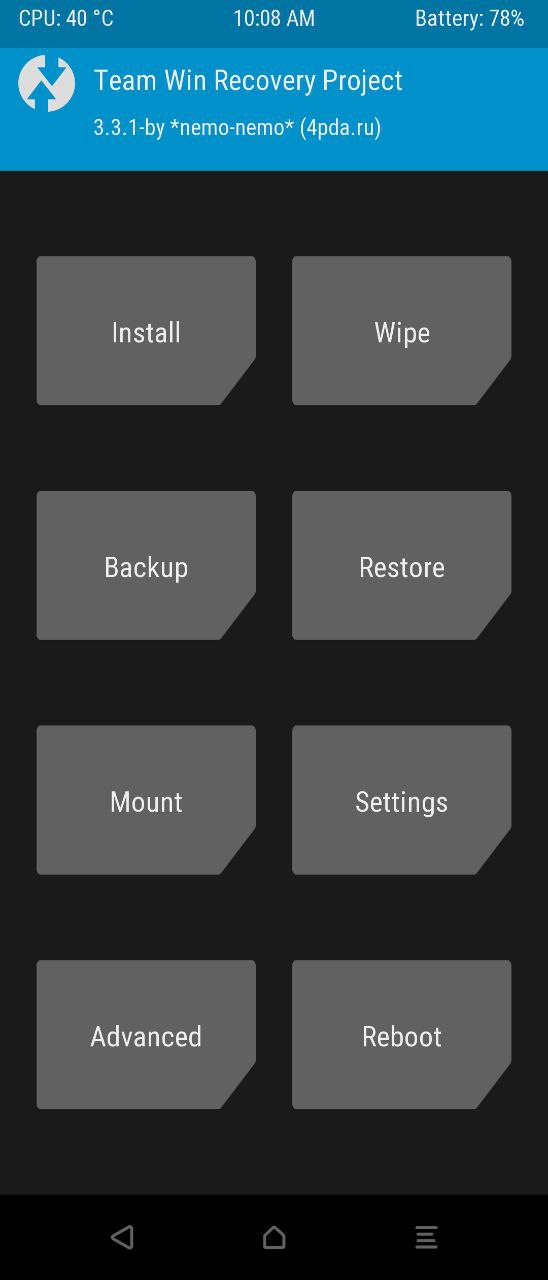
Well, this method is usually entitled as the universal fix for this issue. More often that not, you only need to format the data partition via TWRP and the issue is fixed. It goes without saying that the process will wipe off all the data from your device, so make sure that you have taken a backup beforehand. When that is done, proceed with the below steps to format data via TWRP:
FIX 3: Flash no-verity-opt-encrypt.zip
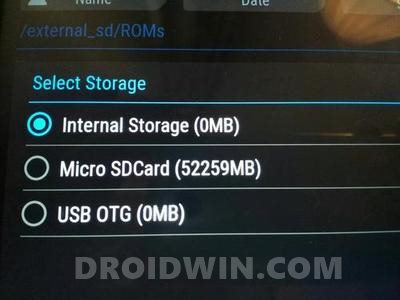
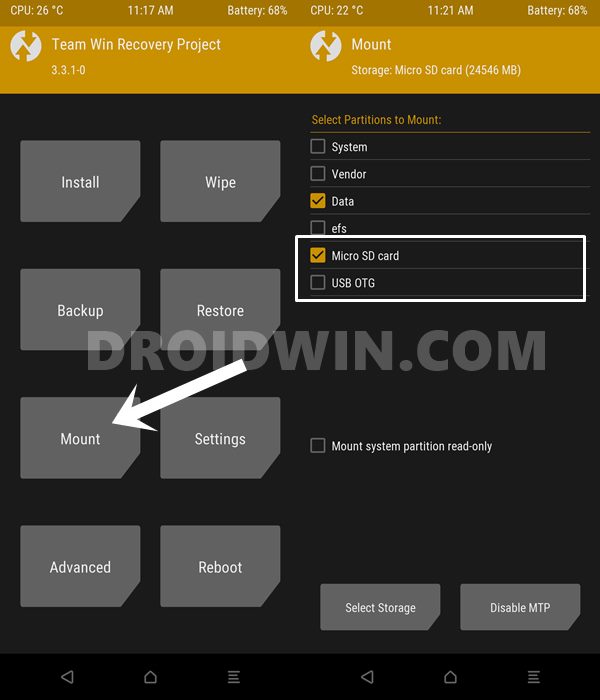
For the unawares, the no-verity-opt-encrypt.zip file is used to decrypt the data partition of your device so that TWRP can access it. So go ahead and flash this file via the TWRP. But here’s the point. Most of you might not be able to identify the file stored on your Internal Storage. Hence after downloading the no-verity-opt-encrypt.zip file, you should move it to your device’s SD card or the USB OTG. If either of these methods didn’t work out for you, then you could take the help of the ADB Sideload feature. Instructions for both these methods are given hereby. Just grab hold of the file from the below link and proceed with the method of your choice: Download: no-verity-opt-encrypt.zip
How to fix ADB Device not found [List of Devices Attached is blank]Detailed Steps to Fix adb is not recognized ErrorHow to Fix Unauthorized Device with ADB Commands [3 methods]Flash Custom ROM After Wiping Internal Storage Without SD Card or OTG
Method 1: Install no-verity-opt-encrypt.zip from SD Card/USB OTG
Method 2: Install no-verity-opt-encrypt.zip via ADB Sideload
FIX 4: Flash No Vertify and Format Data Partition
This is just the culmination of Fix 3 and Fix 2 (in that order). So first off, execute the steps given in STEP 3 and then move over to the instructions of the STEP 2. In a nutshell, here’s what you needs to do. First off, flash the no-verity-opt-encrypt.zip file via TWRP Recovery. Then go to Wipe > Format > Type in YES and perform a right swipe to confirm. After this, reboot your device again to TWRP and the issue should be fixed by now. So with this, we conclude the guide on how to fix the TWRP 0MB Internal Memory issue. We have shared four different fixes for the same. Do let us know in the comments which one managed to spell out success in your case. With that said, if you still have any queries, let us know in the comments section below.
How to Run ADB Fastboot Commands directly on Android without RootFix Magisk patched boot.img issue while Rooting Android 11Root Android 11 via Magisk Patched boot.img (without TWRP)How to Pass Magisk SafetyNet on Rooted Android 11
About Chief Editor