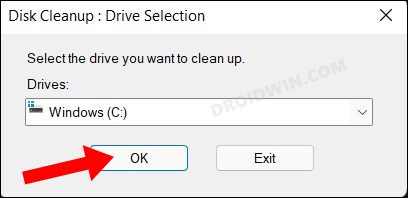
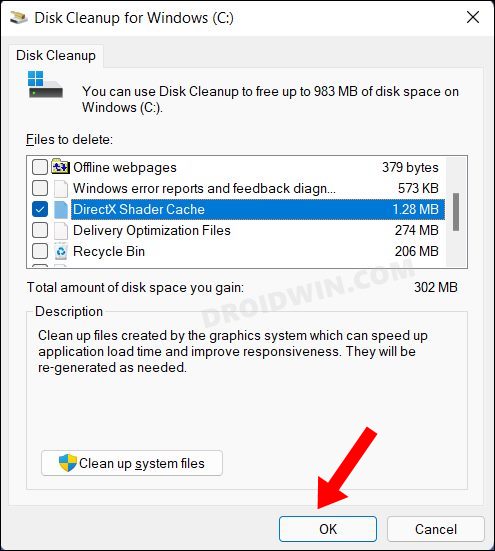
In this regard, deleting the shader cache did manage to spell out success for many users. Not only did they get an additional 10-15 FPS, but the stuttering and minor hitching issues were also rectified. So the best way is to delete these cached files at regular intervals. Or if you wish to take a more aggressive route, then you could prevent the cache files from getting accrued in the first place. So keeping all these perks in mind, let’s get started with the steps to disable and delete the Shader Cache on your Windows 11 PC. Follow along.
How to Delete Shader Cache in Windows 11
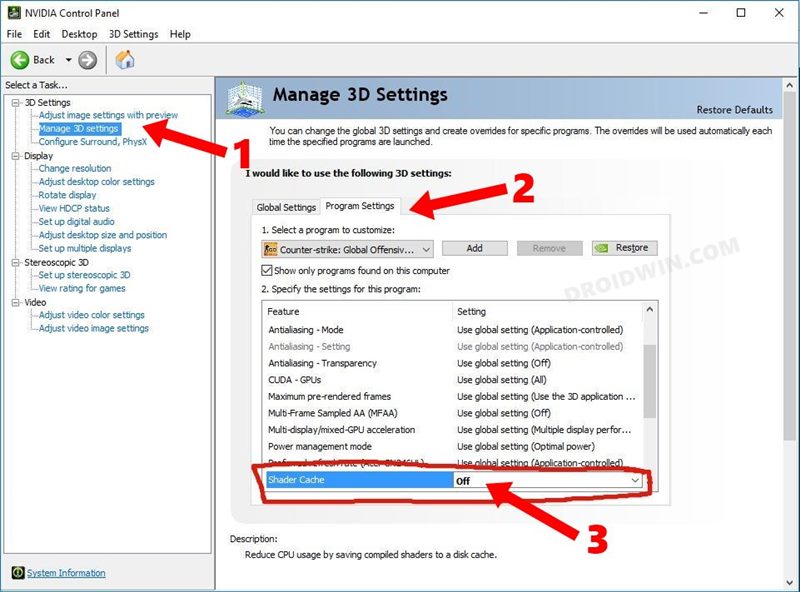
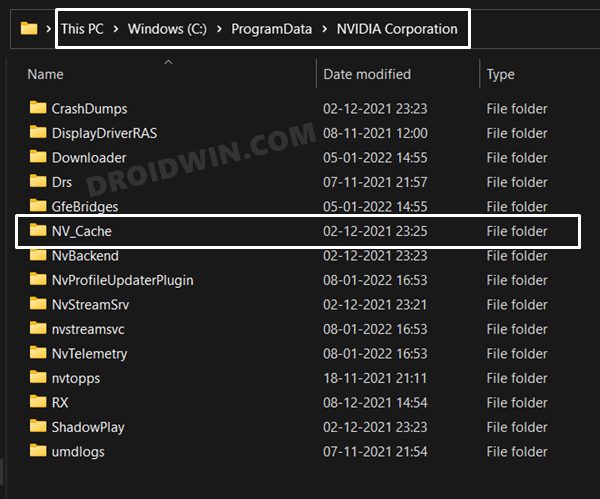
How to Disable Shader Cache in Windows 11
Manually deleting the Shader Cache at regular intervals might prove to be quite an effort-taking task. One approach that you could take is to prevent these cache from getting accumulated in the first place. So proceed ahead with the below-listed instructions to disable the Shader Cache from your Windows 11 PC. That’s it. These were the steps to delete and disable Shader Cache in Windows 11. If you have any queries concerning the aforementioned steps, do let us know in the comments. We will get back to you with a solution at the earliest.
Nvidia GeForce Experience not working in Windows 11 [Fixed]How to Remove Ads on Nvidia Shield and other Android TVsInstall a Third-Party Custom Launcher on Nvidia Shield TVFix Plex: An unexpected playback problem occurred
About Chief Editor